
Build a project template
Create a reusable project plan in Template Studio, with stages and the eleven kinds of steps you can add to them.
A project template is the plan a project follows once a quote is won: which stages run, which work orders, tasks, permits, and payments happen in each one, and in what order. Build one in Template Studio, then connect it to a quote type so it fires automatically (see Connect quotes to project templates). You can also start a project from an enabled template without a quote. See Start a project without a quote.
Before you start
You need the Owner or Admin role. Other roles can open Template Studio and look around, but saving any change, including creating a new template, is restricted to Owner and Admin by default.
Steps
- Go to Settings → Operations → Project templates.
- Click Create. Template Studio opens on a blank template.
- Type a Template name and, optionally, a description.
- Click Create template to save the shell. It starts Disabled, on a Steps tab.
- Click Add stage. Rename the stage in place (its default name is "New Stage").
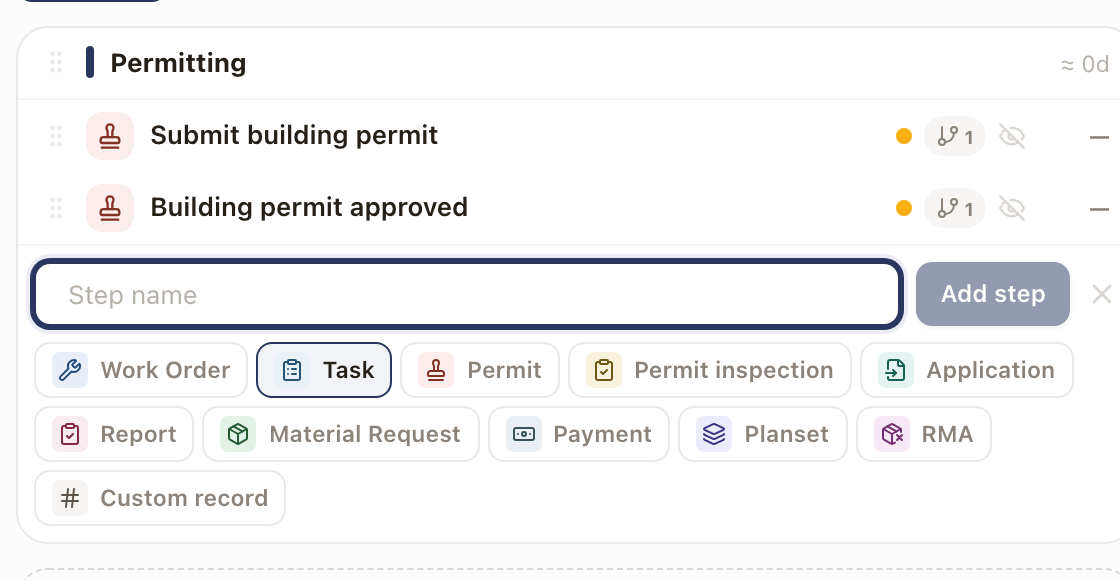
- Inside the stage, click Add step, type a Step name, and pick one of the eleven step types: Work Order, Task, Permit, Permit inspection, Application, Report, Material Request, Payment, Planset, RMA, or Custom record. For a Work Order step, also pick which Work type it should use.
- Set the step's Estimated duration. This is calendar time, not hours of labor, and it drives the project timeline shown on the Schedule tab.
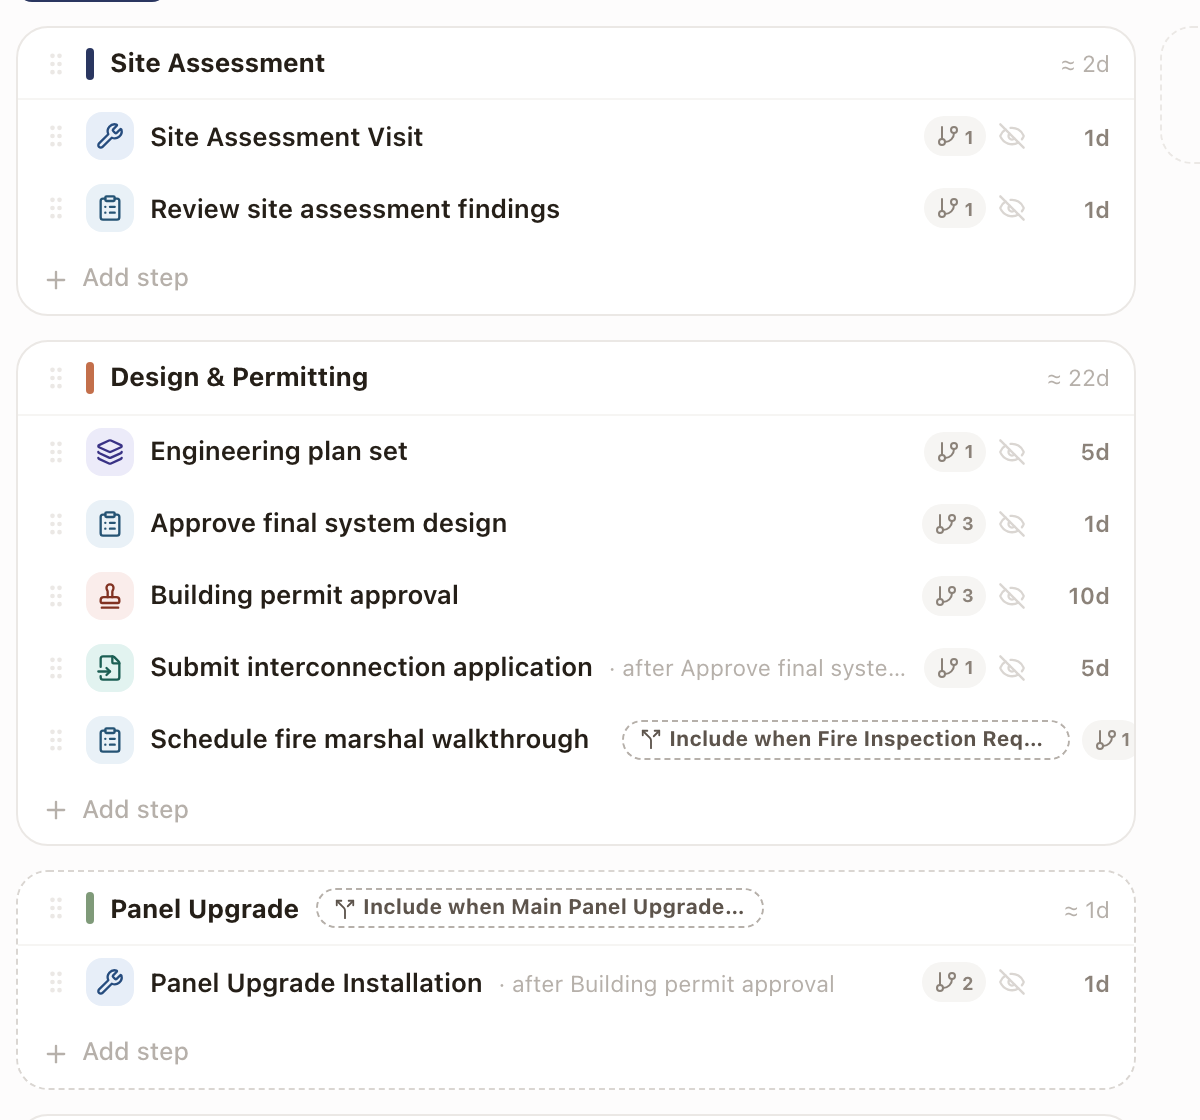
- Repeat for every step and stage your job needs. Drag the handle on a stage or step to reorder it.
- Click Save changes as you go. Template Studio warns you to save before you can flip the Enabled switch.
Work Order steps: what's seeded and what you can override
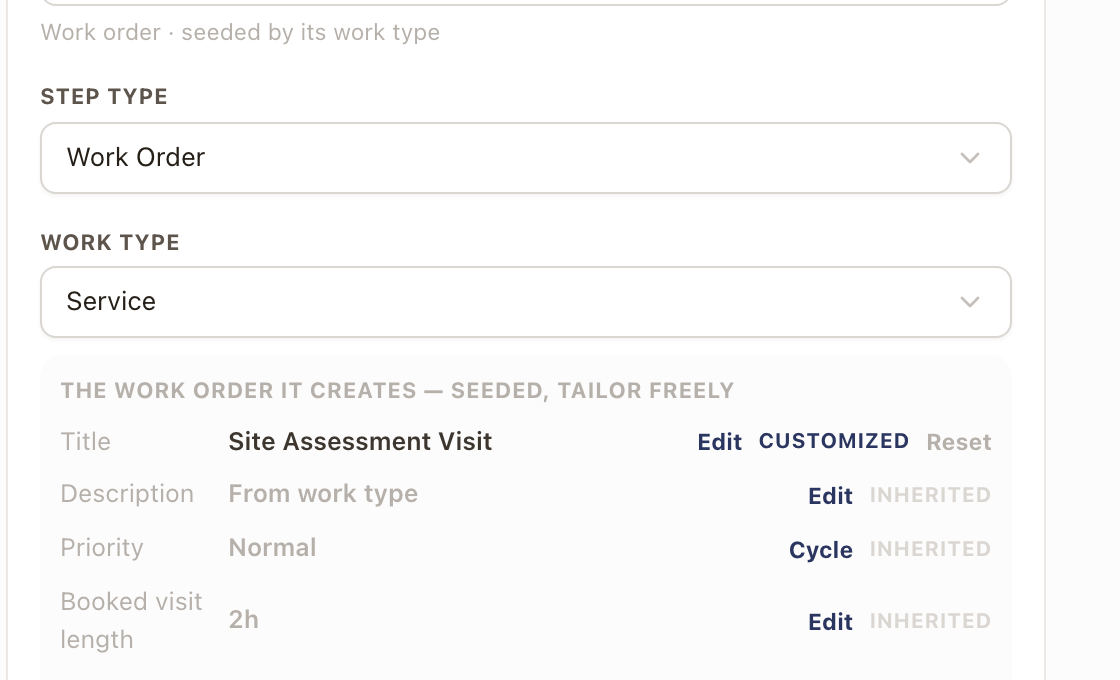
A Work Order step starts fully seeded from its work type: title, description, priority, booked visit length, default report, and scope items. Everything shown as Inherited stays live-linked to the work type, so editing the work type later updates future work orders from this template automatically.
To change something for this step only, click Edit next to that field (Title, Description, Booked visit length) and type a Custom value, or click Cycle to step through priority options. The field switches to Customized with a Reset link to go back to inherited. There's also a "Take scope from the quote instead" switch, for work whose scope varies quote to quote.
When a project is made from a quote, a step with that switch on is named after its work order's title instead of the template's step name. This applies only when the template has one such step. A template with several keeps their template names, so the steps stay apart. A step named after its work order follows the work order if it is retitled. A step you rename keeps your name.
Make a Work Order step create the home's system
On a solar project, the home's system becomes ready to confirm when a work order is completed. By default the Home's System setting decides which one. To make one step in this template decide instead, select the Work Order step, turn on Creates the home's system, and click Save changes.
On projects built from this template, completing that step's work order makes the project's System tab show Ready to confirm. Other work orders don't, and the company setting no longer applies. See Choose when a home's system is created.
The other step types, in short
- Task: a checklist item for a person, with an optional built-in checklist.
- Permit: tracks an external approval, such as a building permit, through to done.
- Permit inspection: inspects a Permit step in the same template and is done when the inspection passes. See Set up permit inspections.
- Application: tracks an application filed with someone else, such as a utility interconnection application. It has an Application type field. The Application step is the application's milestone 1. Picking a type adds a step for each of the type's later milestones, from milestone 2 on, right after the Application step. The Application step and each milestone step are tagged with the type's name and their place, for example Solar Loan Financing · 1 of 4 on the Application step. Under Advanced, Completes when offers Submitted and Approved for milestone 1. See Set up application types.
- Report: a standalone report not tied to a work order.
- Material Request: materials to order or pull before work starts. Under Work order, choose the Work Order step this request supplies, or leave it on None.
- Payment: a step that's done when money is received. Under Waits for payments due at, choose the payment event whose payments it waits for, such as Install complete. The first choice leaves the step to be marked received by hand. See Set up payment events.
- Planset: an engineering plan set, through approval.
- RMA: a return or replacement, through resolution.
- Custom record: any other kind of record your organization tracks, done when it reaches its own "done" status.
Permit, Application, Material Request, Report, and Planset steps also have a Record control. Use it when two steps should work on the same record instead of each creating their own. See Share a record between steps.
An older type, Milestone, only shows up on projects that already used it, for historical display. It's no longer offered for new steps; use a Task for a checkpoint instead.
Choose which fields are needed before production
A project made with New Project asks for the template's fields. You can require some of them before the project goes into production. Until they are answered, it stays a draft.
- Open the template in Template Studio and click the Fields tab.
- To require a field that's already listed, click Edit on its row. To add one, click Add field and pick the Field.
- Turn on Needed before production.
- Click Save, or Add Field for a new one.
The field's row shows a Needed before production icon. On New Project, the field carries a Needed tag and Create in production stays off until it is answered. The draft's Move to production button waits for it too. Projects made from an accepted quote aren't held back. See Start a project without a quote.
Check it worked
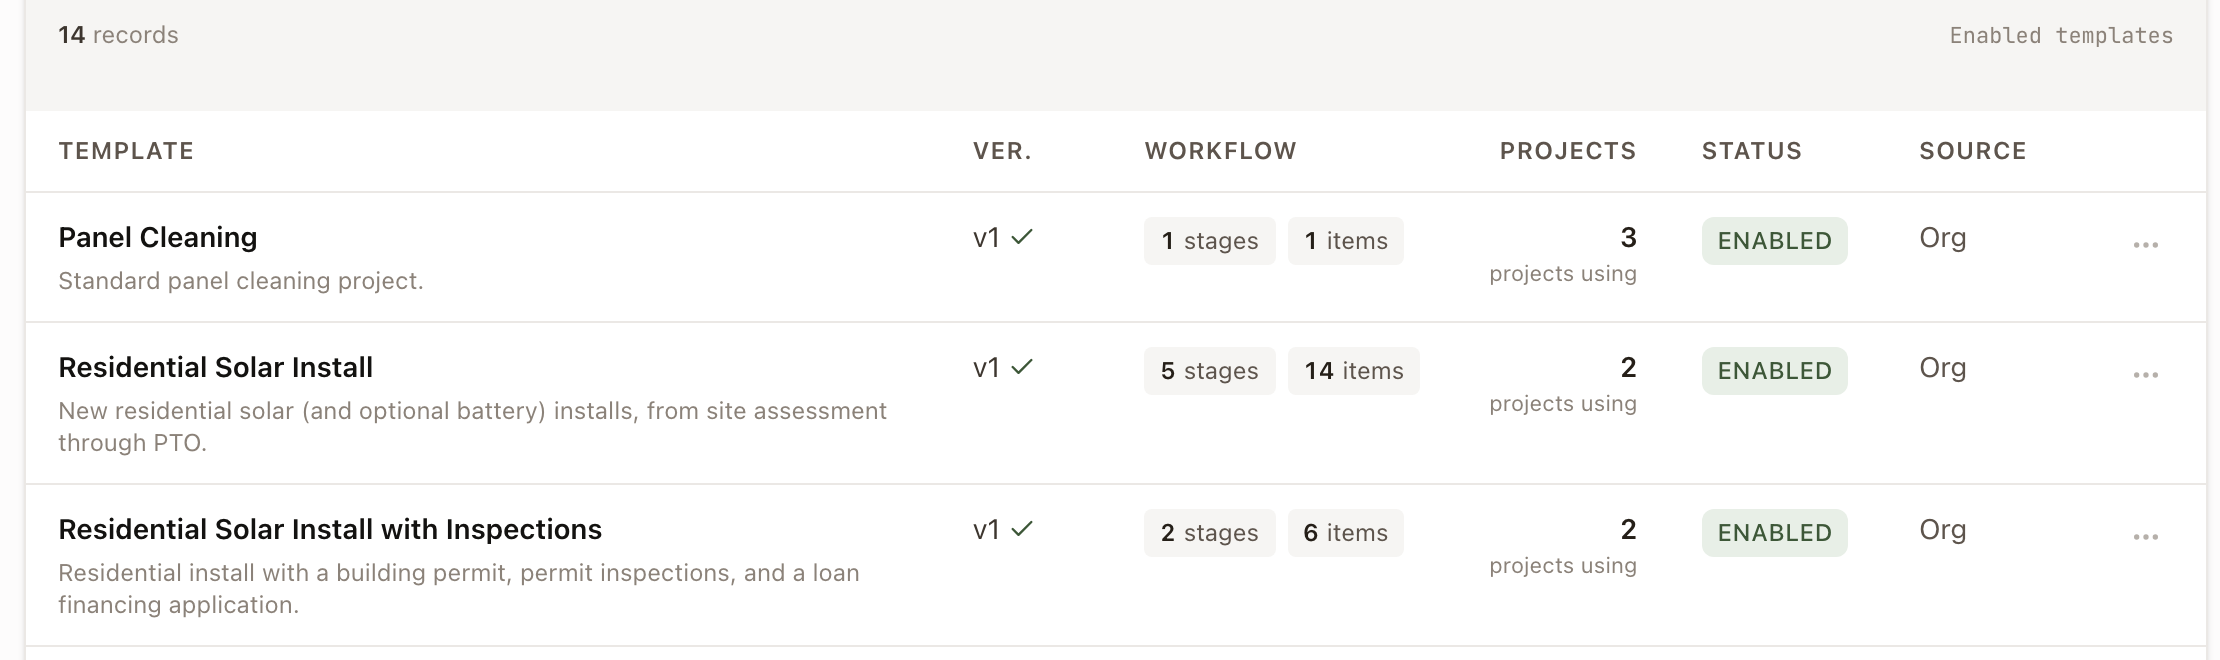
The stage card's item count and calendar estimate update as you add steps. Open the Schedule tab to see every stage and step laid out on a timeline, based on their durations and dependencies. Open the Records tab to see the permits, plansets, applications, material requests, and reports the template will create, and which steps belong to each. Back on the templates list, your template shows its total stage and item count. Once the template is saved, click Walk through project lifecycle at the top of Template Studio to see the project play out day by day. See Finish, enable, and publish a project template.
Common problems
A step won't save, and the toast reports a naming or dependency conflict. Two step names collide inside the template, or a dependency points at a step that no longer exists. Rename or remove the conflicting item.
I can't edit a template. It's a solarOS template, tagged Platform in the list, and it's read only. Go back to the templates list and use Make a company copy from that row's menu to get an editable version.