
Set up permit inspections
Tag a work type and a report type for permit inspections, then add a Permit inspection step to a project template.
A permit inspection is a visit from the city or county to check a permitted install. To track one on a project, the template needs a Permit inspection step that points at a Permit step. That step creates a visit work order, and it runs on a work type and a report type you've tagged for permit inspections. This guide sets up all three. Once they exist, your team works inspections as described in Work permit inspections on a project.
Before you start
You need the Owner or Admin role. The project template needs a Permit step for the inspection to point at. See Build a project template.
Tag a work type
The work type decides what the technician's inspection visit is called, how long it's booked for, and how it's scheduled.
- Go to Settings → Work types.
- Click New Work Type.
- Type a Name, such as "Municipal Permit Inspection", a Standard scope, and a Default duration.
- Turn on Used for permit inspections.
- Click Create Work Type.
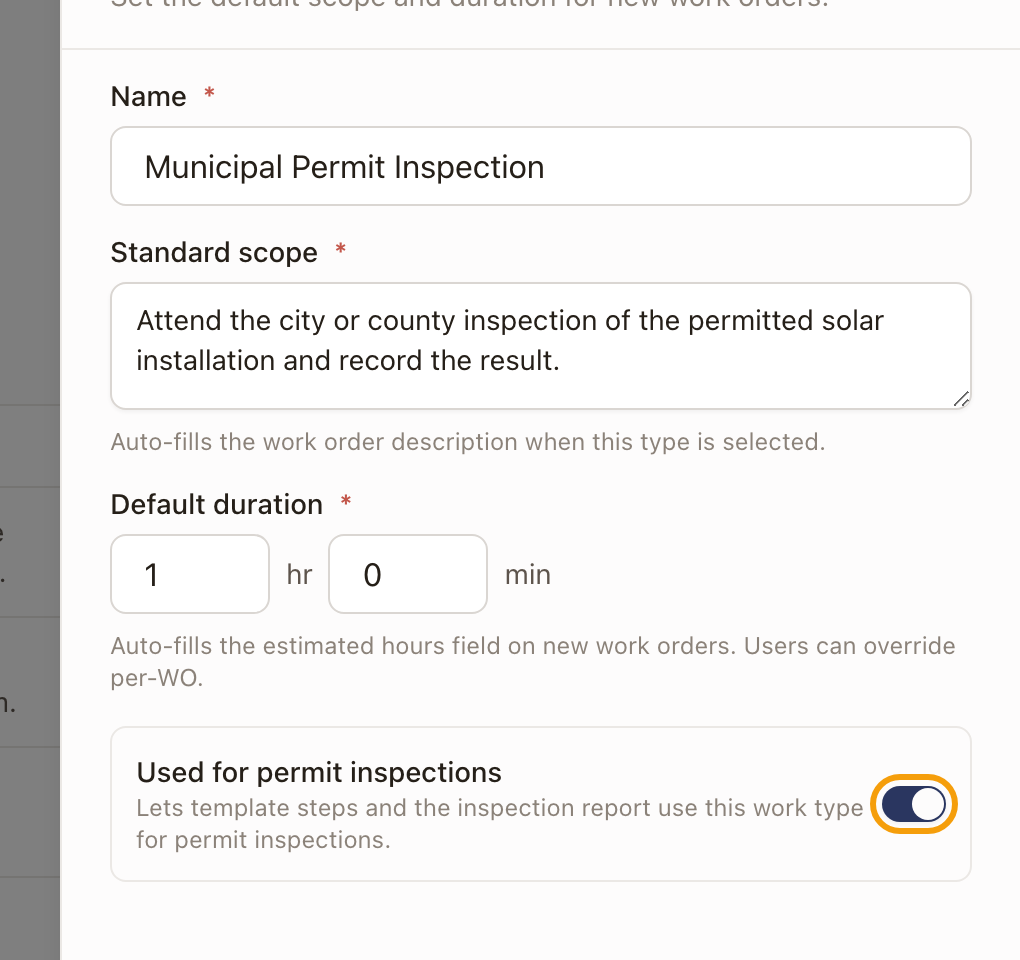
To tag a work type you already made, open it from the list and turn on the same switch. Work types that solarOS provides can't be tagged. Make your own.
Check it worked: the work type shows an Inspection label under its name in the list.

Tag a report type
The report is the form the technician fills out at the inspection. A tagged report always ends in a result the project can act on.
- Go to Settings → Report types, click Add Report Type, and give it a Name. Choose the Inspection category if you like.
- Click Create & build form.
- Add the sections and fields you want the technician to fill in, such as a photo of the correction notice. The report already asks for the inspector's name. See Build report types.
- Open the ⋯ menu at the top right and click Report settings.
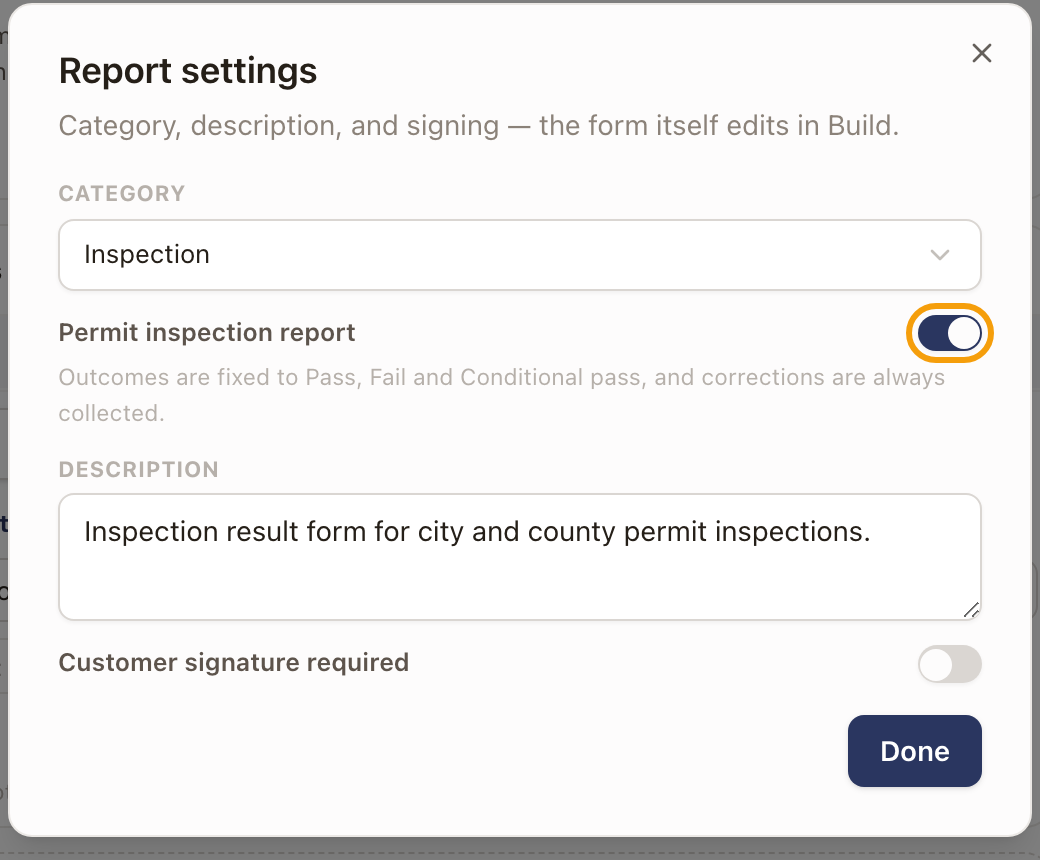
- Turn on Permit inspection report, then click Done.
- Click Save changes.
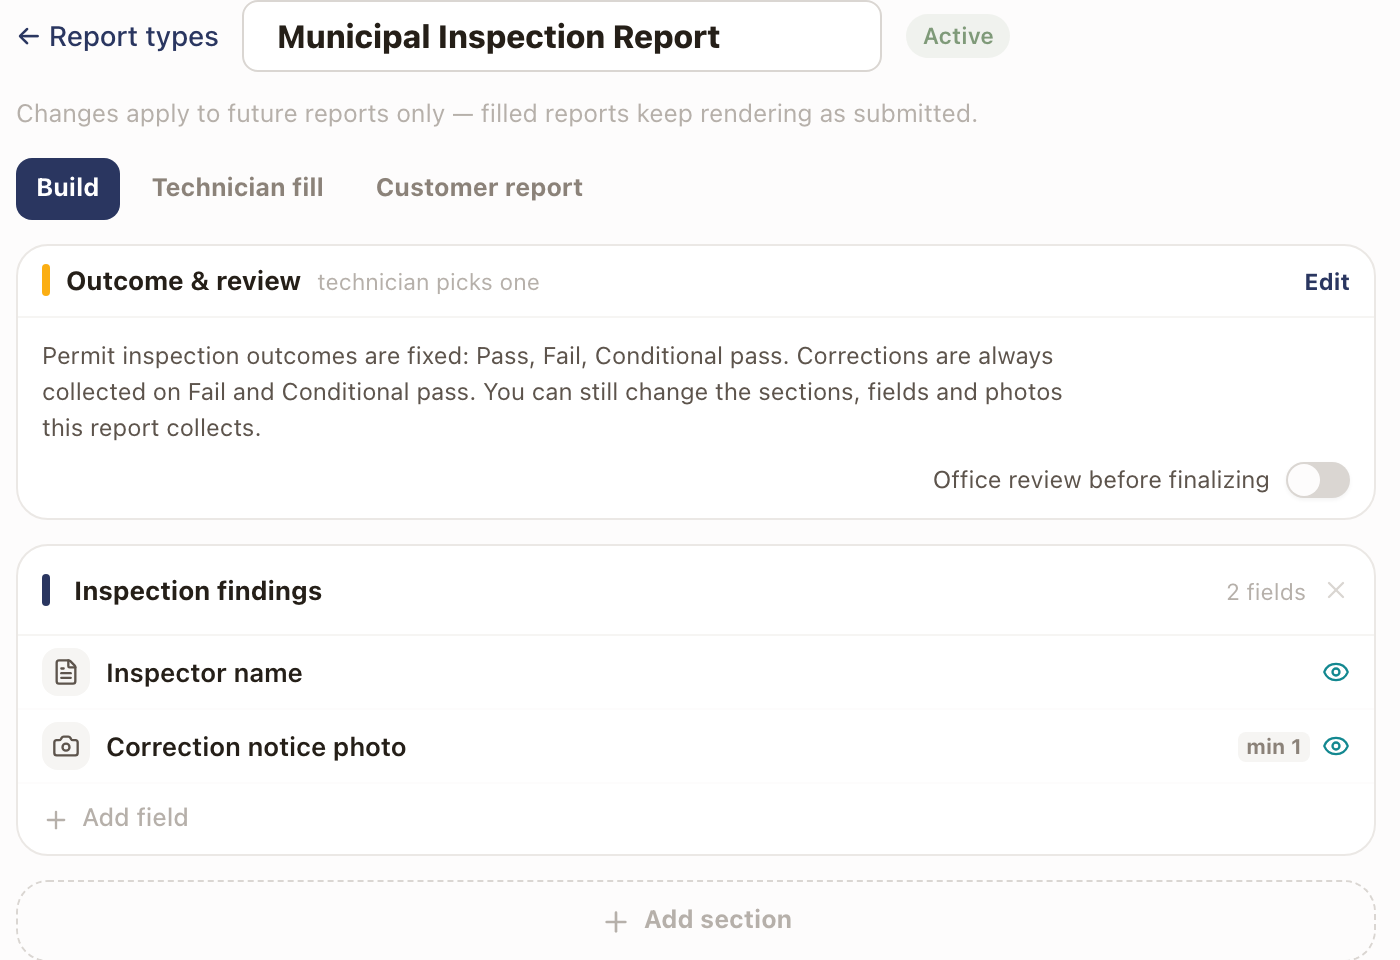
With the tag on, the outcomes are fixed to Pass, Fail, and Conditional pass. You can't add outcomes or edit them. The technician records the corrections the inspector listed when they pick Fail or Conditional pass, and a Fail needs at least one. Each correction is Plans or Field work. To offer subcategories under each, such as Labeling or Structural, see Set up correction categories. You can still change the sections, fields, and photo minimums.
Check it worked: the Outcome & review box on the Build tab explains that the outcomes are fixed, and the report types list shows a Permit inspection label on the report.
Add a Permit inspection step to a template
- Go to Settings → Project templates and open the template, or click Create to start a new one.
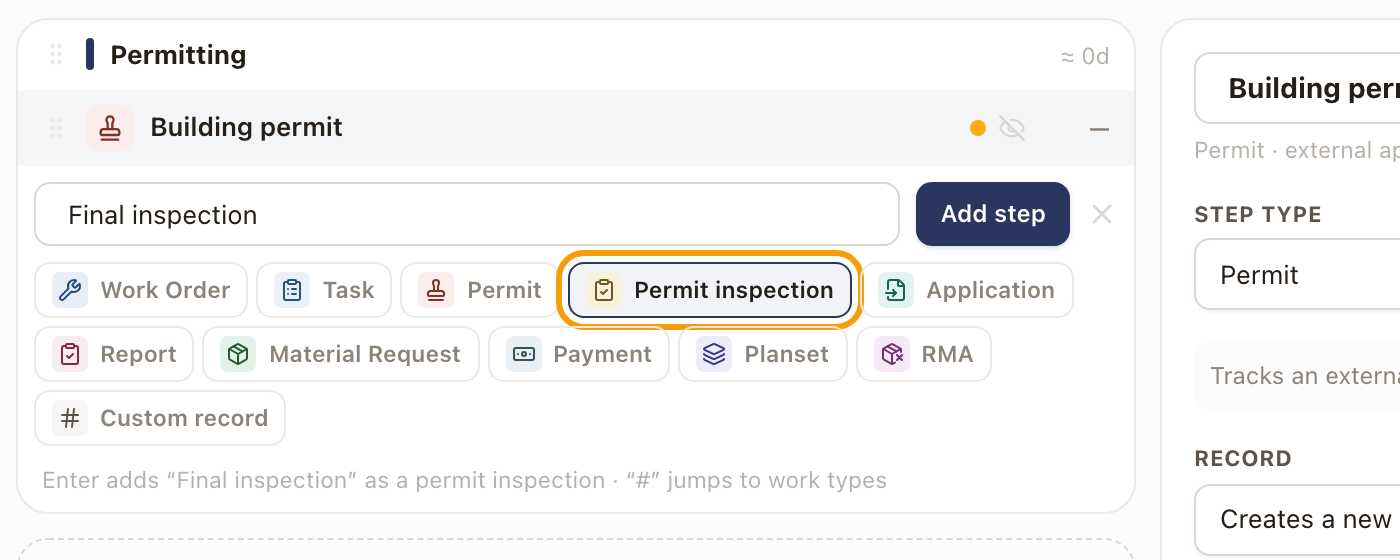
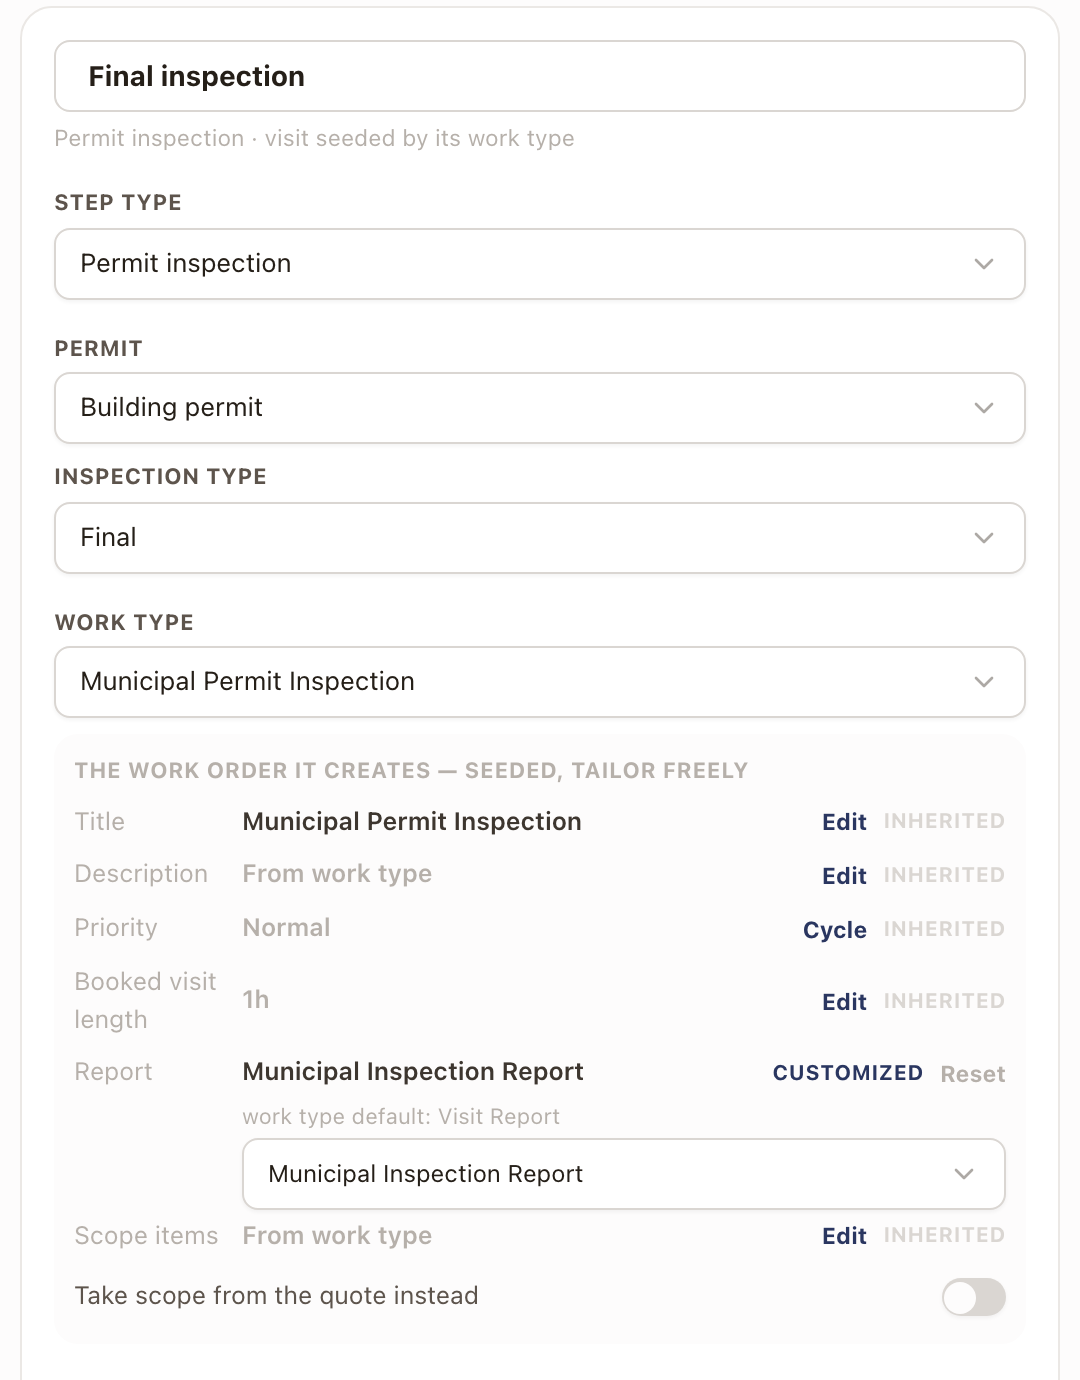
- In the stage where the inspection belongs, click Add step, type a Step name such as "Final inspection", and click Permit inspection. Then click Add step.
- Select the step. Under Permit, choose the Permit step this inspection checks.
- Under Inspection type, choose Rough, Final, Structural, Electrical, Mechanical, Roofing, Foundation, Fire, Trench, or Other. It starts from the step name when the name contains one of these words.
- Under Work type, choose the work type you tagged. Only tagged work types are listed.
- Under Report, choose the report type you tagged, or leave it on Inherit from work type. Inherit uses the report your company marked Required for that work type, so that report must be tagged. See Match work types to the right report.
- Set the Estimated duration.
- Under Include inspection, choose when the step applies. Always or by a field rule includes it on every project, or only when an Include when rule matches. When the jurisdiction requires it includes it only when the project's jurisdiction lists this inspection type as required. See Set up jurisdictions for permitting. A project with no jurisdiction leaves the step out. The Include when rule box is replaced by this choice.
- Click Save changes.
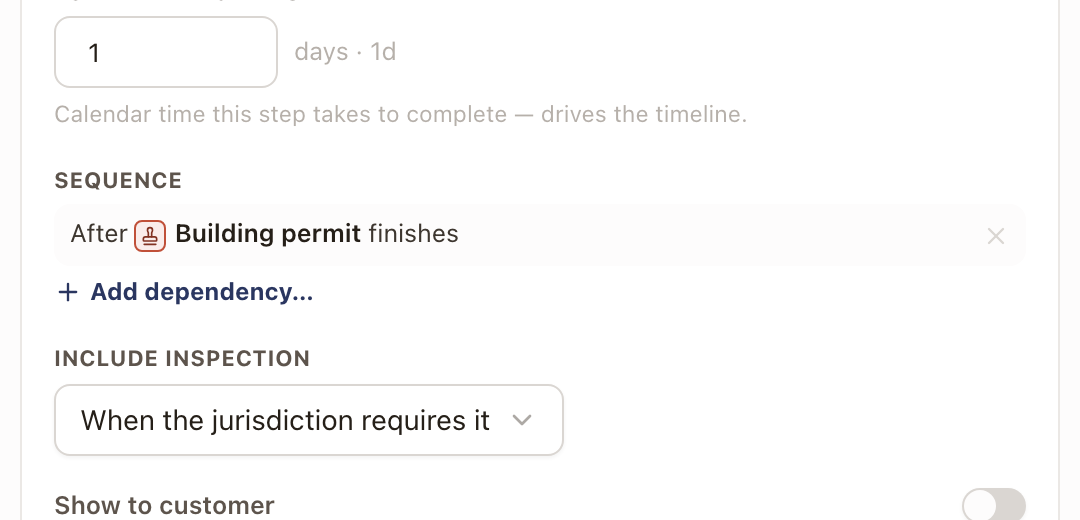
The step waits for its Permit step to finish. A step set to When the jurisdiction requires it is checked again when the project's jurisdiction changes. Add a step for each inspection the jurisdiction requires, for example a rough inspection and a final inspection on the same permit.
If a Work Order step already uses a tagged work type, select it and click Convert to a permit inspection step to change it in one click.
Check it worked: the step shows with a Permit inspection icon in the stage. Projects created from this template get a step for each inspection, with a visit work order ready to schedule once the permit is approved.
Choose how a permit resubmission finishes
When a failed inspection needs new plans, the designer can send the permit back to the jurisdiction. That adds a Resubmit permit step. By default it is done when someone clicks Mark resubmitted on the permit. To make it wait until the jurisdiction approves the permit again:
- Go to Settings → Operations → Project settings.
- In the Permits card, turn on Wait for re-approval after a resubmission.
The switch saves when you turn it on. It starts off. See Work permit inspections on a project for how the question gets asked.
Common problems
- The work type or report type isn't listed on the step. Only types tagged for permit inspections appear. Turn on the tag as shown above.
- The template won't turn on and says the report it collects must be a permit inspection report. The step is on Inherit from work type, and your company has no tagged report marked Required for that work type. Choose a tagged report under Report on the step.
- The Permit list on the step is empty. Add a Permit step to the template first.
- A project is missing the inspection step. The step is set to When the jurisdiction requires it, and the project has no jurisdiction or its jurisdiction doesn't list that inspection type. Add the requirement under Inspections on the jurisdiction, or switch the step to Always or by a field rule.