
Set up application types
List the lenders, utilities, and agencies your team files with, the milestones each application moves through, and the fields and instructions it needs.
An application type describes one kind of filing: who it goes to and its milestones. Examples are a loan from a lender, a utility interconnection, or an HOA review. Milestones are how applications move forward. Each one is a checkpoint with its own What to send list, such as the application itself, then a permit package, install proof, and a final sign-off. The first milestone is usually sending the application. Every Application of a type starts with that type's recipient and milestones. A type can also list the Fields its applications need and hold your team's Instructions for working them.
Before you start
You need the Owner or Admin role. Other roles can see the list but can't change it.
Add an application type
- Go to Settings → Operations → Application types.
- Click Add application type.
- Type a Name, such as "Solar Loan Financing".
- Type Submitted to, the lender, utility, or agency that receives it.
- Leave Enabled on. Only enabled types appear when someone adds an application or builds a template.
- If financing options will use this type as their application process, turn on Financing application.
- A new type starts with one milestone named Application, or Credit application for a financing application. Rename it if your team calls it something else, such as "Pre-approval". Under its What to send, type each document or item and press Enter. Drag the items to reorder them.
- For each later checkpoint, click Add milestone. Give it a name, an Expected days value, and its own What to send list. Expected days is how long a submitted milestone can wait before it needs you. Drag the milestones into the order they happen. A type can have up to 20.
- Add Instructions and Fields now or later. See Write instructions and List the fields an application needs.
- Click Add application type.
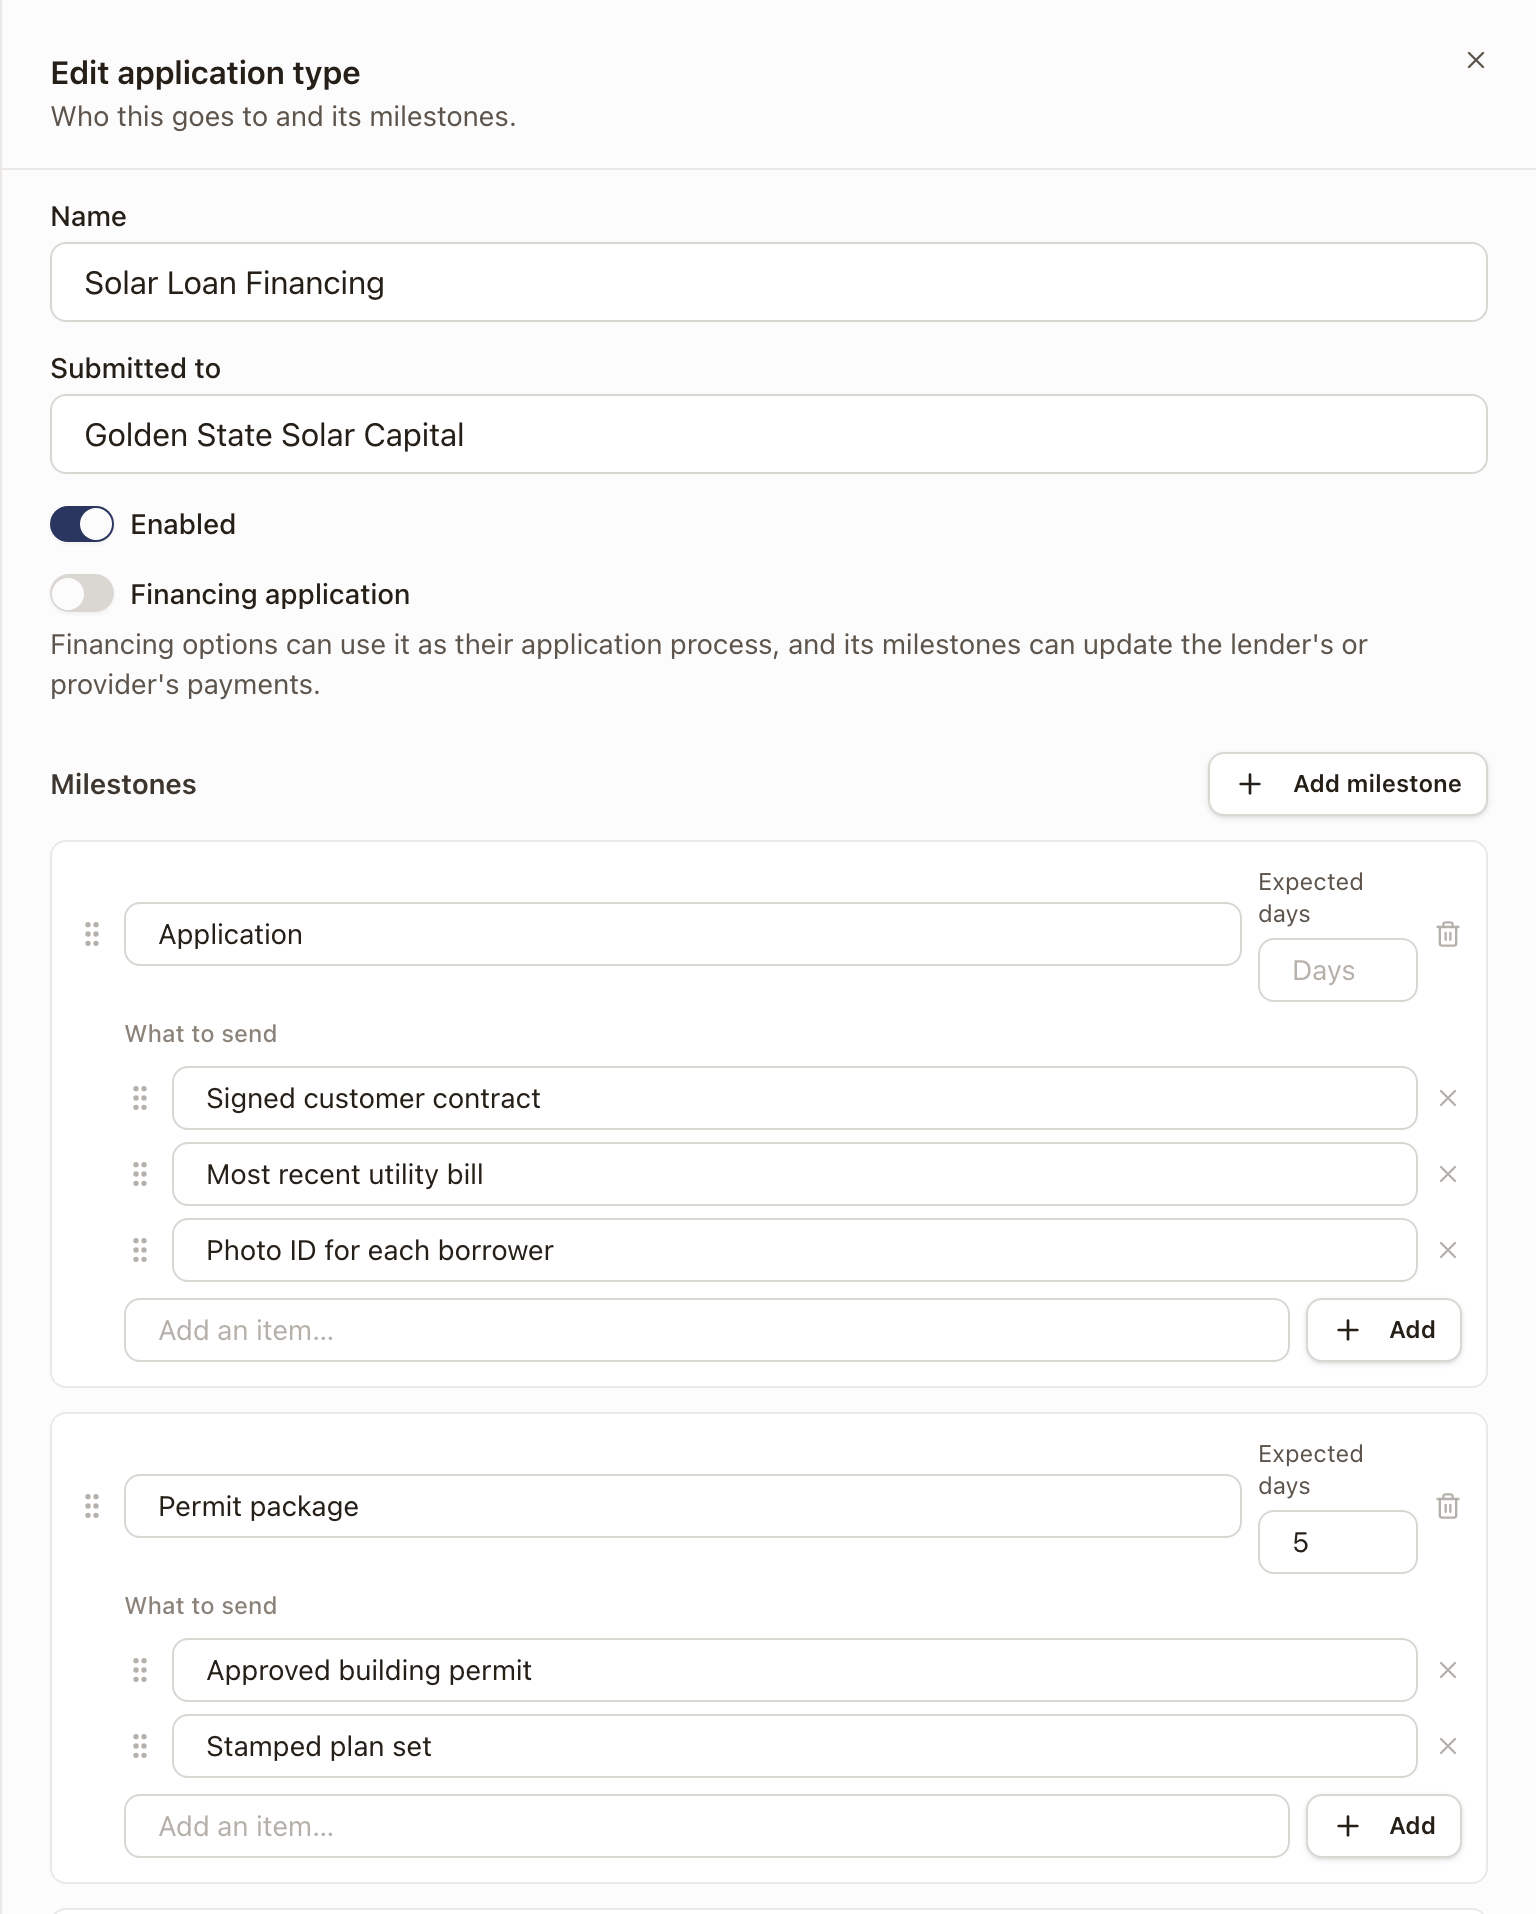
Each milestone's What to send list becomes the checklist on that milestone of every application of this type.
If you remove every milestone, the editor shows Milestones are how applications move forward. Make at least one. You can still save the type. An application of a type with no milestones gets one milestone of its own, named Application.
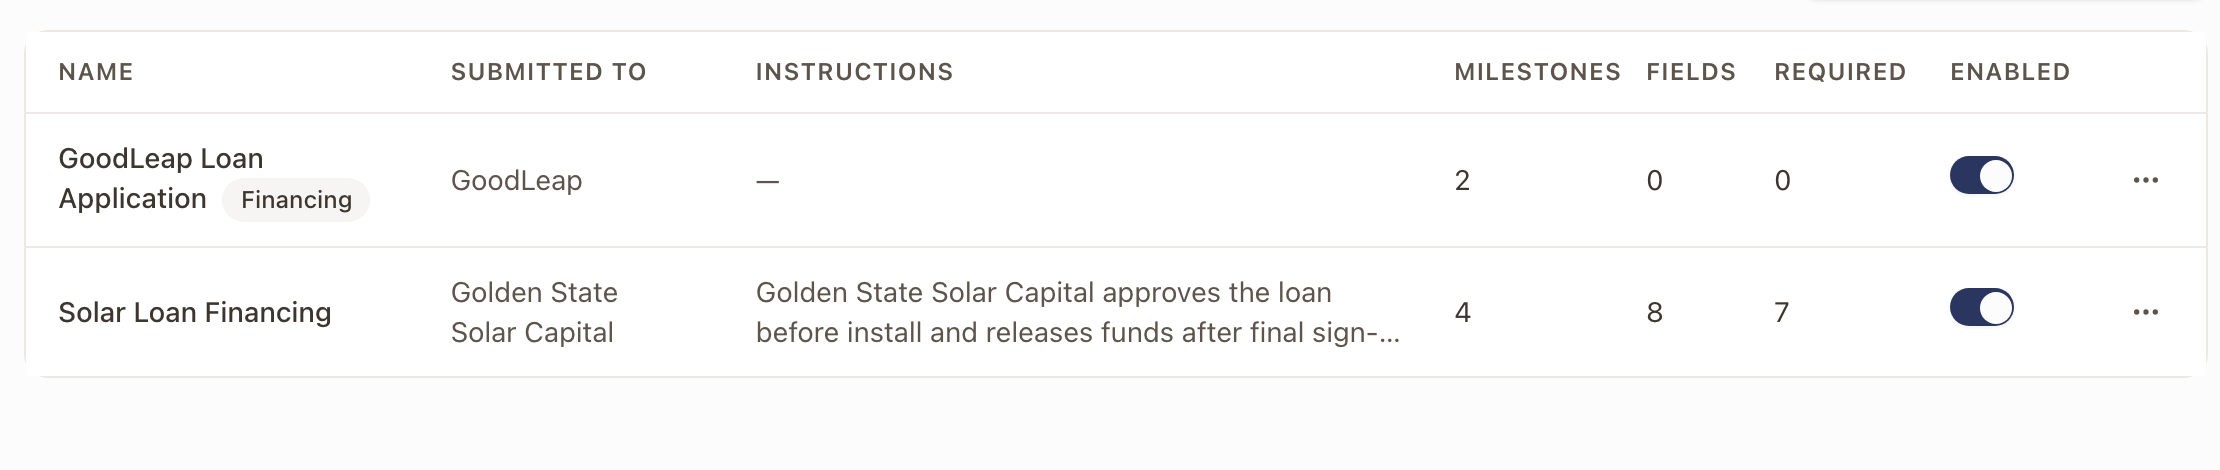
Check it worked: the type appears in the list with its Submitted to value, the start of its Instructions, and its number of Milestones, Fields, and Required fields.
Link milestones to payments
On a type with Financing application on, each milestone has an Updates payment choice once you've saved the type. It lists the payments in the funding schedule of every financing option that uses this type as its application process. Until a financing option uses the type, the editor says so and the choice stays on None.
On a linked milestone, Submitted marks the payment requested, Approved marks it approved, and Needs more marks it rejected.
Write instructions
Instructions are your team's own write-up of how to work this kind of application: the process, common pitfalls, and the steps for each milestone. They show in full at the end of every application of this type.
- Click the type's row, or click the ⋯ button on it and choose Edit.
- Type in the Instructions box. The toolbar has Heading, Bold, Italic, Bulleted list, Numbered list, and Link.
- To add a link, select the words, click Link, type an address that starts with
https://ormailto:, and click Add link. - Click Save changes.
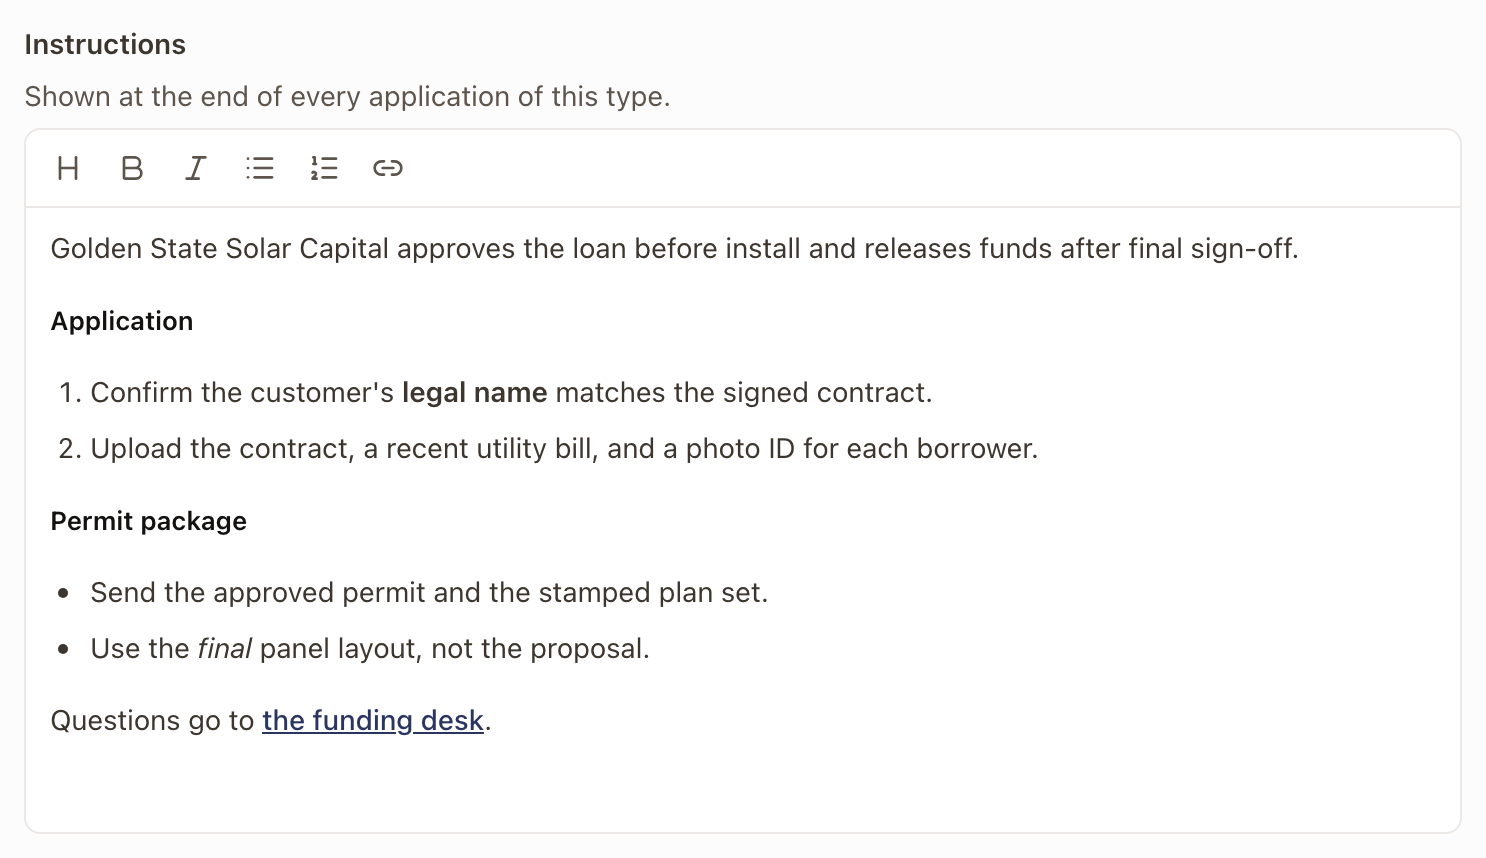
Links in the instructions open in a new tab. Leave the box empty if the type needs no instructions; applications then show none.
List the fields an application needs
The Fields list is the information every application of this type needs, in the order your team fills it in. Each entry is one of your fields, or a customer, property, or solar design value.
- Click the ⋯ button on the type's row and choose Edit.
- Under Fields, click Add field.
- Search, and pick an entry. The Fields group has your company's fields and solarOS fields. The Customer and property group has the customer's name, email, and phone, the service address and its parts, and the solar design's module, inverter, and batteries.
- Beside the entry, choose when it's needed: Needed for one of the type's milestones, such as Needed for Permit package, or Not required. A new entry is needed for the first milestone.
- Drag the entries into the order you want. Click the trash can to remove one.
- Click Save changes.
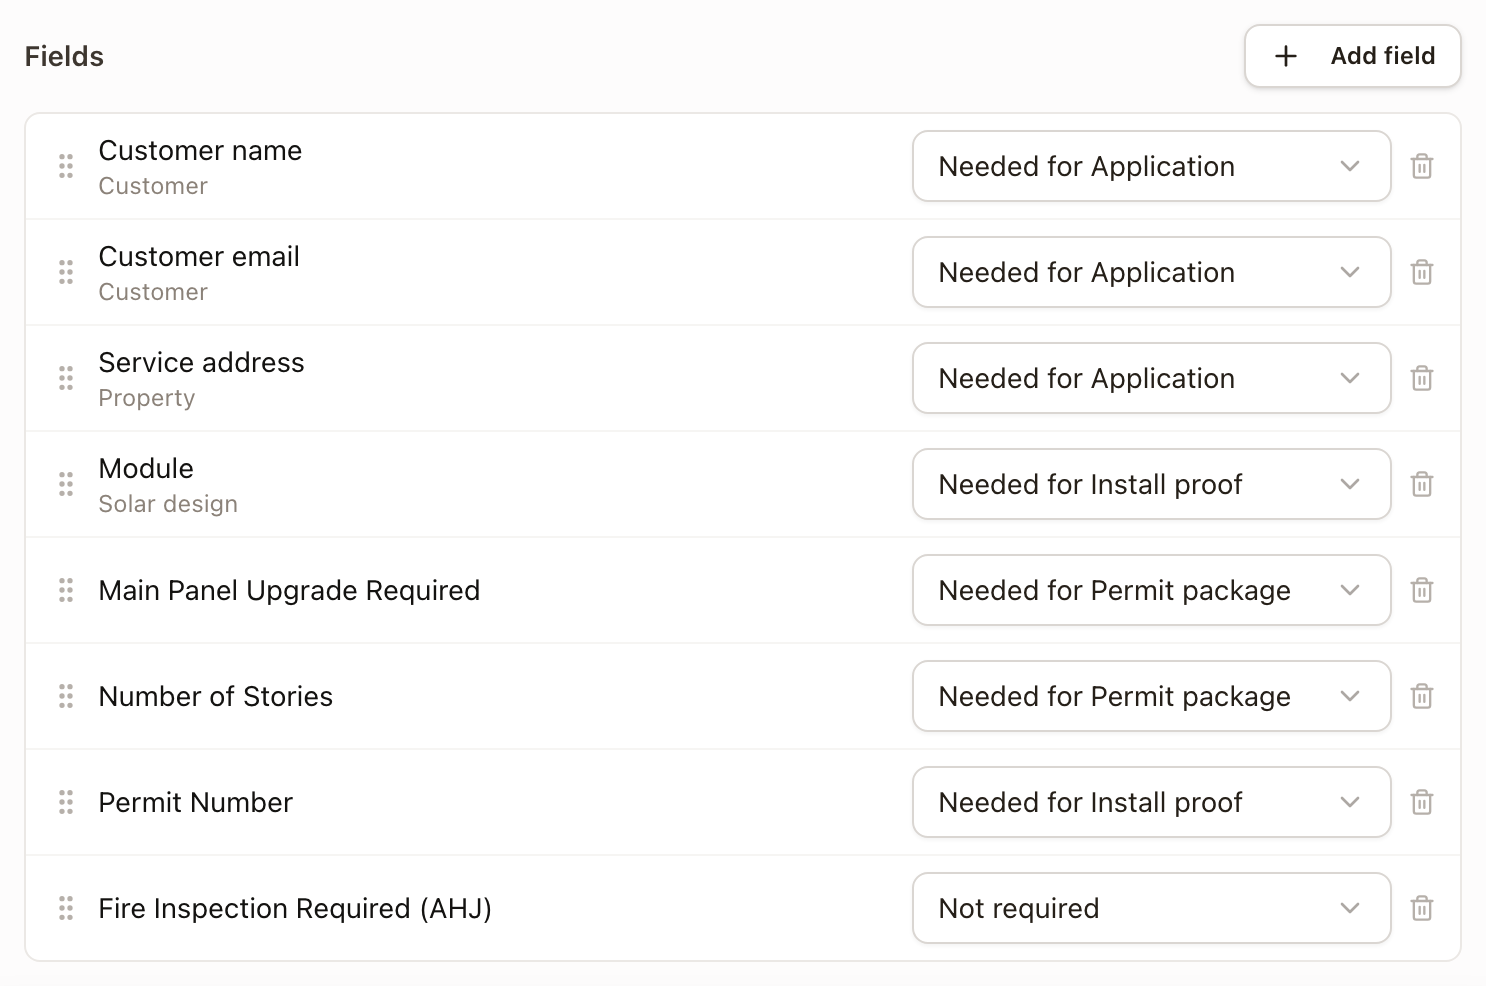
Money amounts aren't offered, and neither are financing and incentive numbers such as APR, dealer fee, loan term, and incentive value. Hidden fields aren't offered either. Each field can be on the list once.
Needed for sets what an application counts as missing. An application counts the fields needed for its next milestone to send and for the milestones before it. A blank field needed for a later milestone shows on the application but isn't counted yet. Not required fields are never counted; they're on the list for reference.
If you remove a milestone, the fields needed for it become Not required.
Changes to the list show right away on every application of this type, including ones already in progress.
Check it worked: open an application of this type. Its Fields section lists the entries in your order. See Work an application and its milestones.
The Applications column in the Field library (Settings → Sales → Field library) names the application types that list each field. It is read only: you add a field to an application type here, on the type. Click a type's name in the column to open its editor.
Change, turn off, or delete a type
- Click the ⋯ button on its row and choose Edit to change the name, recipient, milestones and their What to send lists, instructions, or fields.
- Use the Enabled switch on the row to hide a type from pickers without deleting it.
- Choose Delete to remove it. Applications that already used the type keep their milestones.
Use a type in a project template
- Open a template in Settings → Project templates, and add an Application step.
- Select the step. Under Application type, choose the type.
The Application step works the type's first milestone. Under its name it reads, for example, Starts the application · Milestone 1 of 4: Application. If the type has more milestones, solarOS adds one step for each of them right after the Application step, in order, and each one waits for the step before it. Drag them to where they happen in your project. Every step of the application is tagged with the type's name and its place, such as Solar Loan Financing · 2 of 4. Projects built from the template then show the whole filing in the plan, with its recipient and checklists filled in.
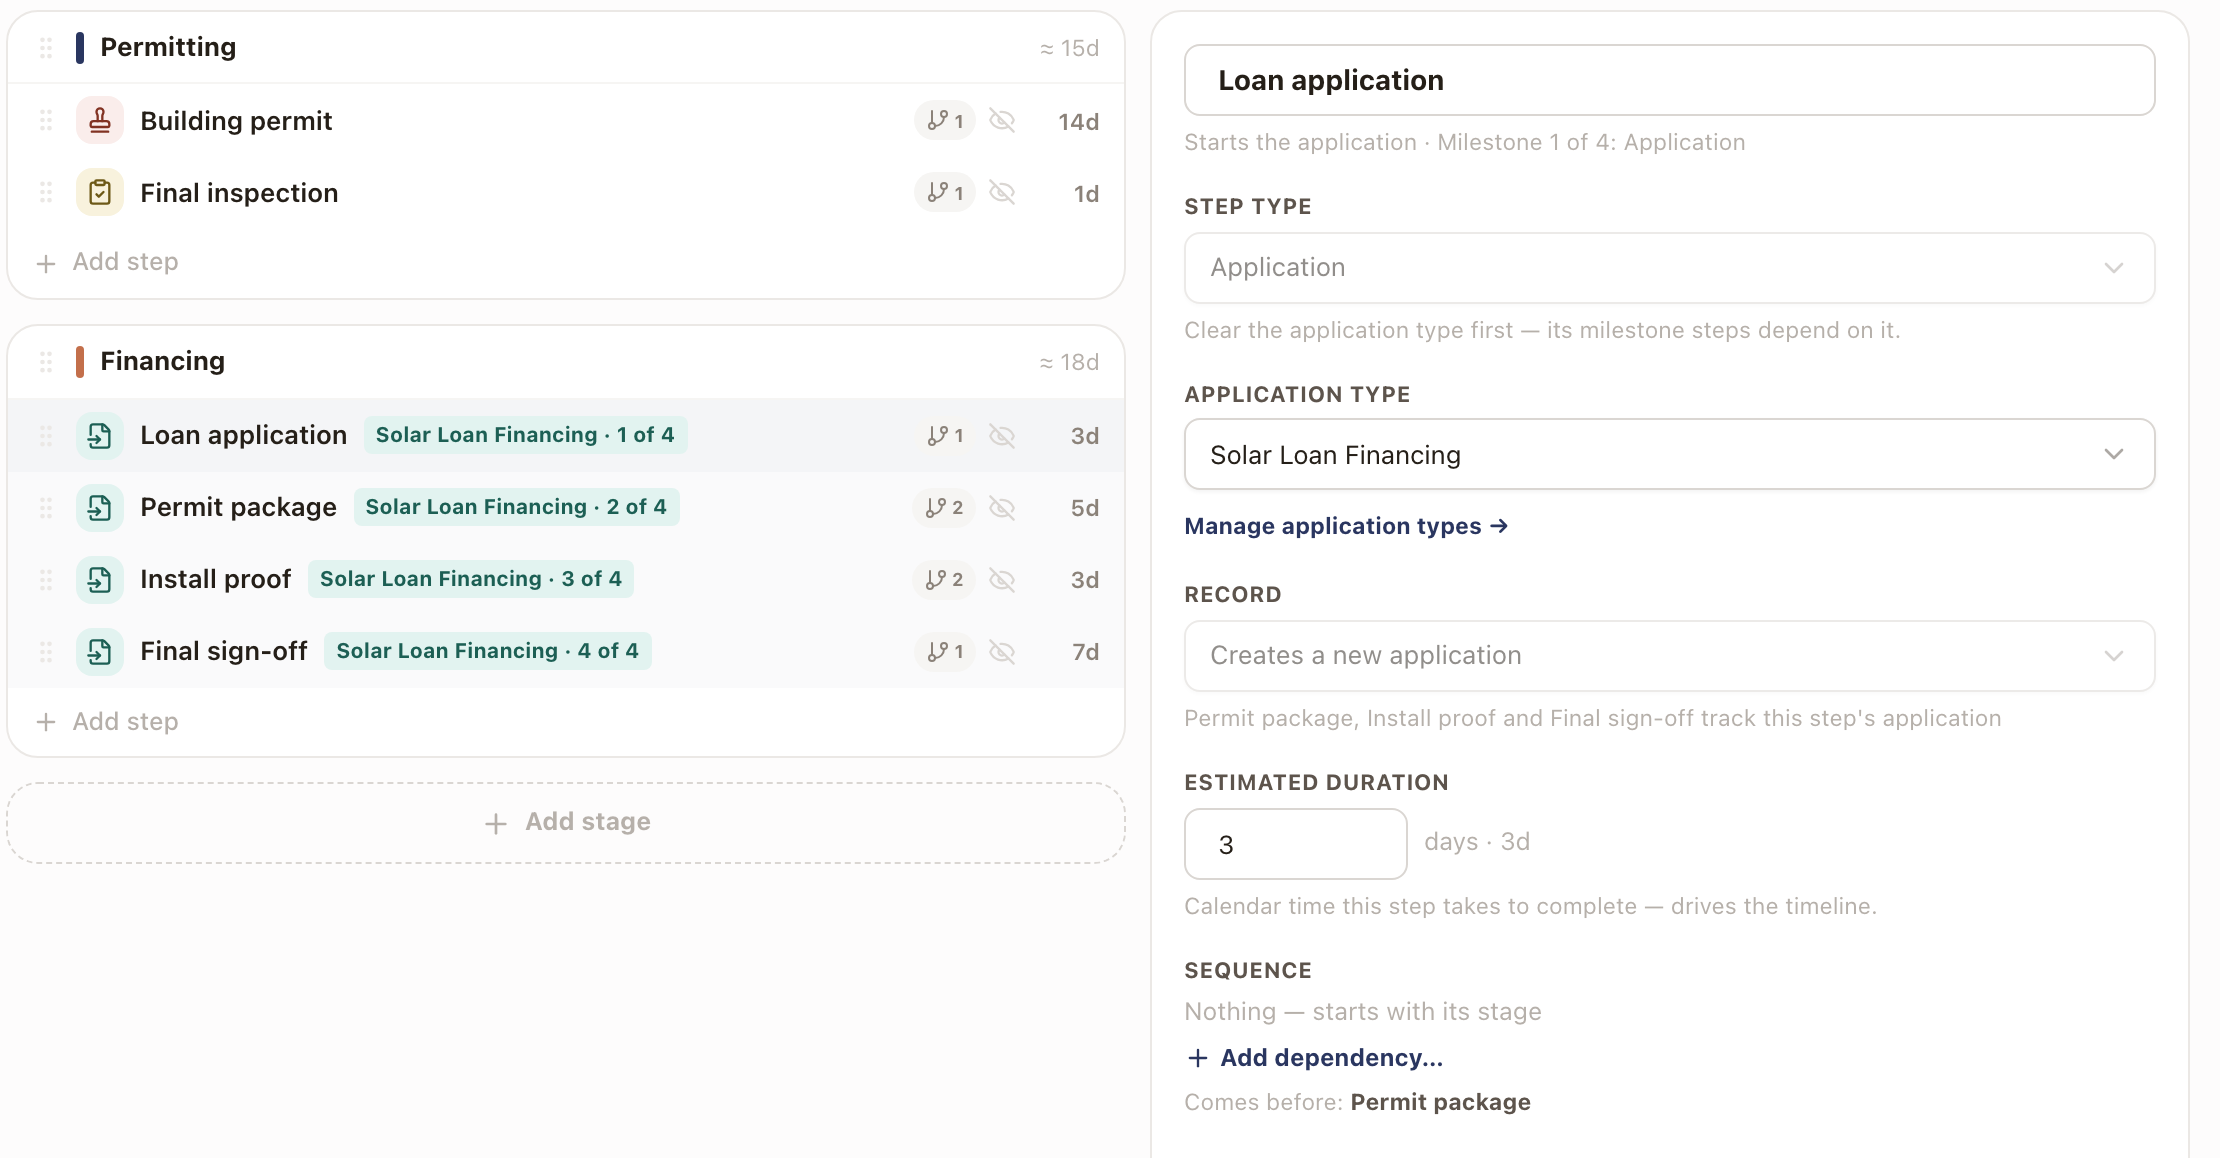
Under Advanced, Completes when sets whether the Application step is done when its first milestone is Submitted or Approved. The default is Approved.
If you change the type on the step later, Template Studio asks whether to replace its milestone steps. If you delete the Application step, it asks whether to remove its milestones too. A template can't be enabled while a milestone step isn't one of the type's milestones, comes before its Application step, repeats a milestone, or places the type's first milestone, which the Application step already works.
To work an application on a project, see Work an application and its milestones.
Common problems
- A type isn't listed when someone adds an application. Check that Enabled is on.
- No milestone steps were added when you chose the type. The Application step works the first milestone, so steps are added only for the milestones after it. A type with one milestone adds none.
- A field isn't in the Add field list. It's already on the type's list, it's a money amount or a financing or incentive number, or it's hidden in the Field library.