
Design the roof and panelsBeta
Draw roof planes and obstructions on satellite imagery, place panels by hand or with Auto-fill, and apply the design to the solar quote.
The System tab of a solar quote shows satellite imagery of the property. You trace each roof plane, mark obstructions, and place panels. The quote's system size and yearly production come from this drawing. Contact solarOS support to turn it on for your company.
Before you start
You have a solar quote open in the builder. See Build a solar quote. Entering the customer's usage on the Usage tab first lets Auto-fill size the system to cover it.
Open the drawing
- In the quote builder, click System.
- Wait for the imagery to load. The first time, the builder fetches the roof analysis for the property address.
The bar at the top of the drawing reads Drawn, then the panel count, system size, and yearly production, then the panel in use. The tools are in a rail on the left. Layers, Configure, Setbacks, and Production are at the top right. Configure, Setbacks, and Production open one at a time.
Once the quote has a location, the property pin isn't drawn on the roof. Click Move property pin, next to Center on pin, to show it and drag it. Click Done to hide it again. A quote with no location asks for the pin first.
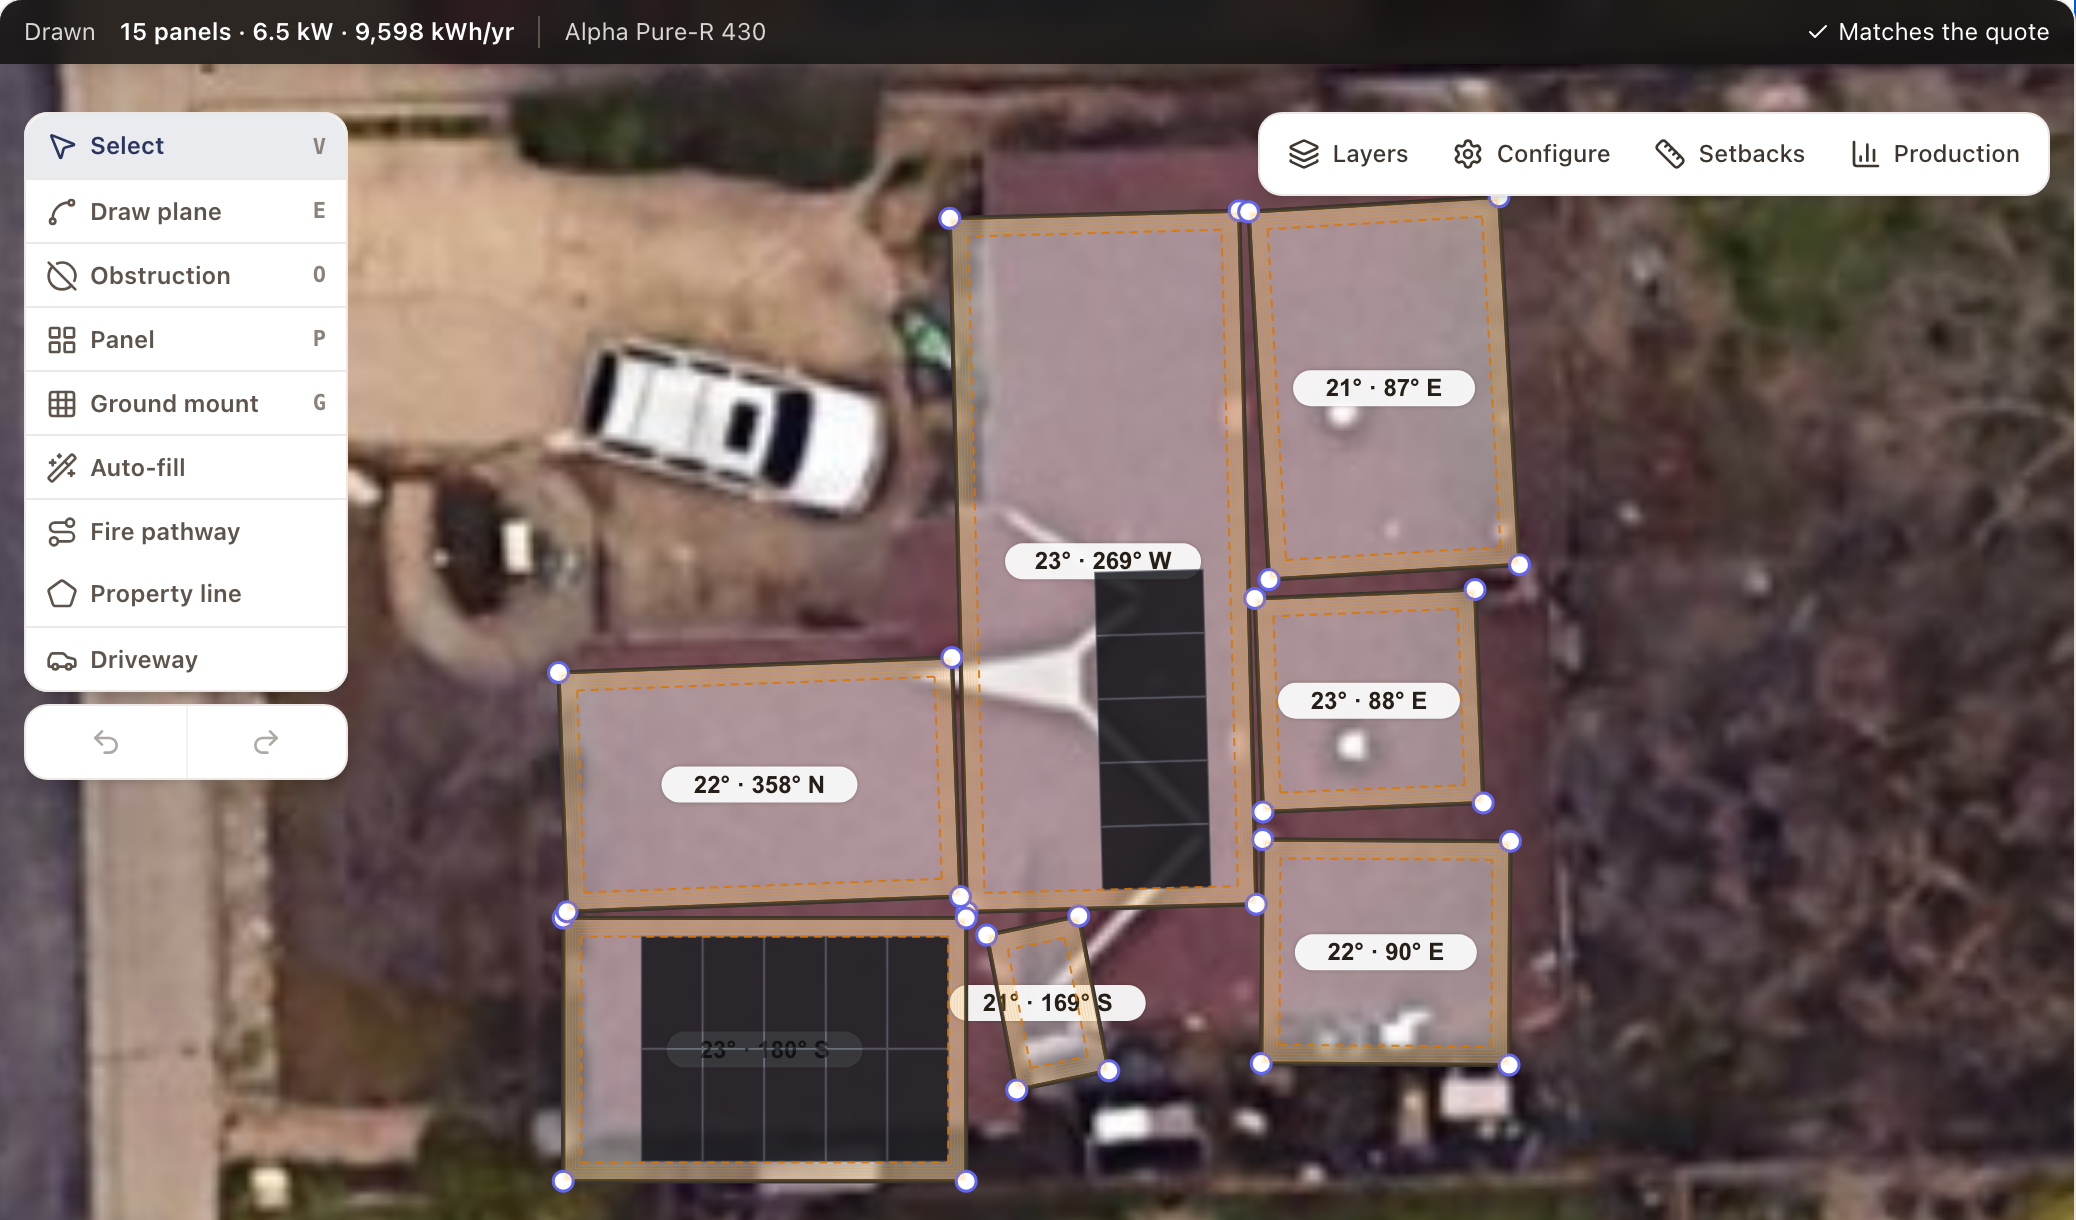
Start from the Google outline
Click Start from Google to create editable outlines from the roof planes found in the imagery. Each slope becomes its own outline, turned to match, with its own tilt and facing. This button only shows while the drawing is empty. Adjust the outlines by dragging their corners, and check Tilt and Facing on each plane.
Draw a roof plane yourself
- Click Draw plane (or press E).
- Click each corner of the roof plane. Close the shape by clicking back on the first corner.
- Click Select (or press V), then click the plane to open its panel.
- Check the Name, Tilt, Facing, and Level. Correct them if the roof differs. The panel also shows the plane's Area and Sun hours.
To set the facing, type it in Facing, drag the tip of the arrow on the selected plane, or click an eave or ridge and click Set azimuth from this edge. To set an edge's type, click the edge and pick its Edge Type: Ridge, Hip, Valley, Eave, Rake, or Wall. If the roof has more than one story, set each plane's Level. When planes are joined, the button under Level, for example Apply level 2 to the 3 connected planes, puts all of them on that level. Drag across a plane you haven't selected to box-select its panels.
Hold Alt to draw without snapping. Hold Shift to keep lines at 0, 45, or 90 degrees. A new line also snaps square to the line you just drew, at any roof angle, with a corner mark and a guide. Dragging a corner brings it square with its neighbors. The drawing has no grid to snap to.
Mark obstructions
Click Obstruction (or press O), pick a Shape of Circle, Rectangle, or Polygon, and drag or click it onto the roof for a vent, chimney, or skylight. Select an obstruction to set its size and Height above roof. A rectangle has a Length and Width, and a circle has a Radius, each in feet and inches. Height above roof is in inches and starts at 8. A rectangle drawn on a roof plane lines up with that plane's panels. Click Delete Obstruction to remove it.
Place panels
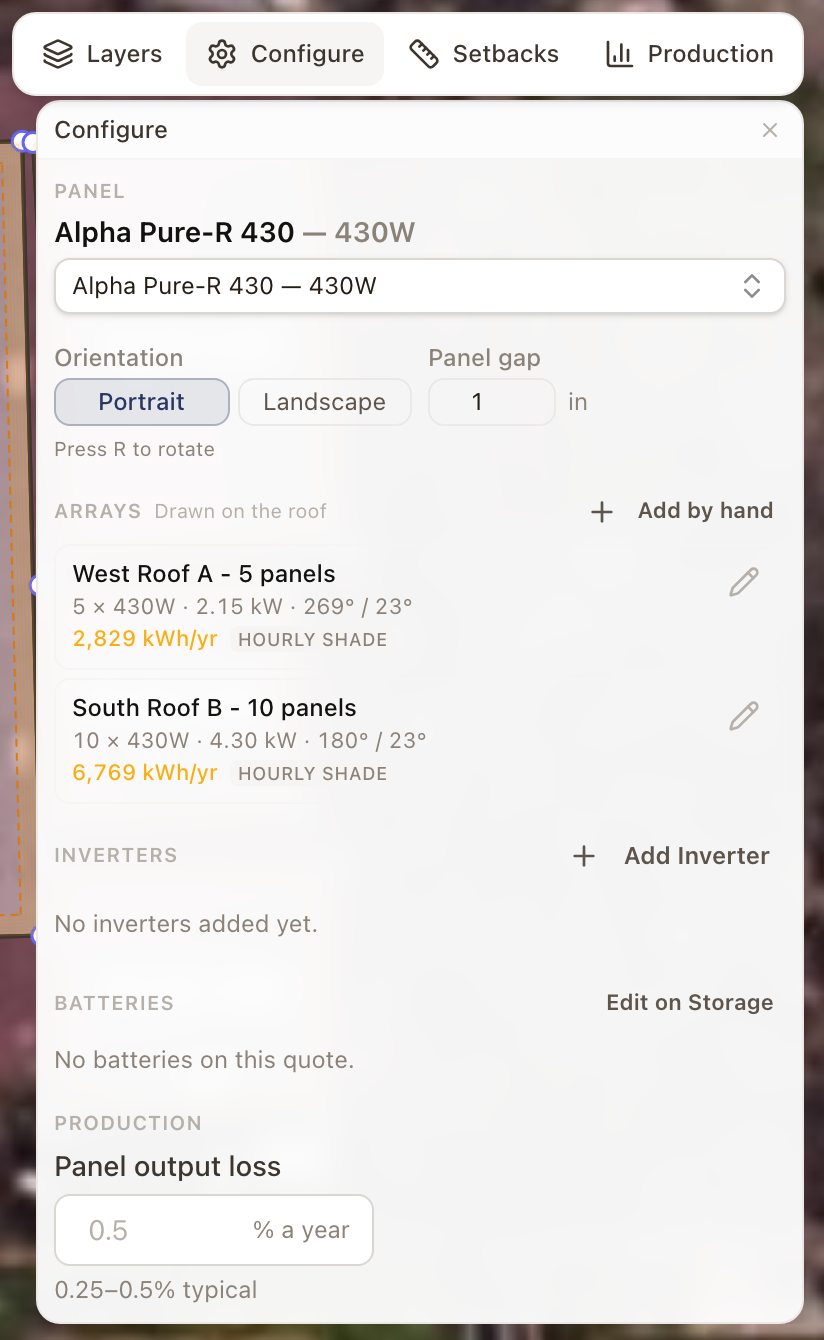
Pick the panel first. Click Configure, then search for the panel under Panel. The Panel tool opens the same choice. Set the Orientation (Portrait or Landscape) and the Panel gap in inches. The gap starts at 1 inch and stays with the drawing. If the quote already has a panel, a new design starts on it. Otherwise it starts on the panel set on the quote template under Solar defaults, then the panel your company set under Settings → Sales → Pricing & assumptions → Equipment for new designs, then the first active panel. A design you already drew keeps its panel. If you change the panel later, each array keeps its rows and columns at the new panel size.
To fill the roof automatically:
- Click Auto-fill.
- If the quote has usage, enter a Target offset (% of usage). Panels go on the sunniest spots first until that share of annual usage is covered, and planes that get little sun stay empty. Without usage, enter a Panel count, or leave it empty to fill every sunny plane. A message tells you if the roof tops out below your target.
- Choose Portrait or Landscape.
- Click Fill to add panels to planes that have none, or Clear & fill to start the whole roof over.
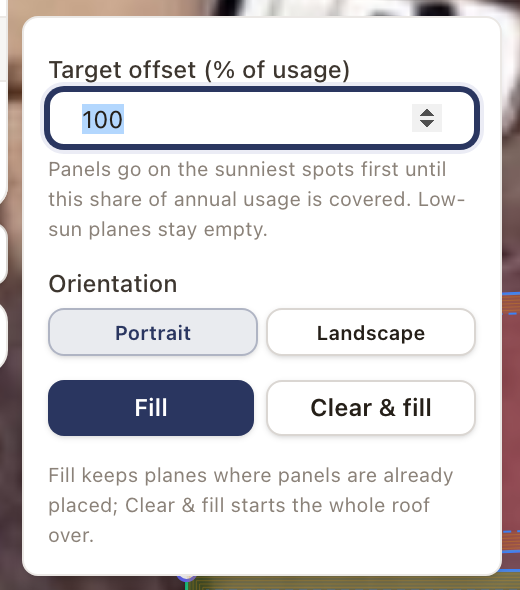
To place panels by hand, click Panel (or press P) and click or drag over a plane. Press R to rotate. Select a plane and click Fill in its panel to fill just that plane. Once a plane has panels, the button reads Refill.
To move a panel, select it and drag it. A panel that lands on a different plane joins that plane and turns to match its angle. To copy panels, select them, press Ctrl+C (Cmd+C on a Mac), press Ctrl+V (Cmd+V), and click where they go. Pasted panels turn to the plane under the pointer and snap to the panels already there. Hold Alt to paste without snapping.
Add a ground mount
Click Ground mount (or press G) and drag a footprint on the ground. Racks start at a 25 degree tilt facing south. Select the rack to change its rows, columns, tilt, azimuth, and height above grade. Click Delete ground array to remove it.
Set the setbacks
Click Setbacks to see the clearances kept from each roof edge: Ridge, Hip, Valley, Eave, Rake, Wall, and Fire pathway. If you are an Owner or Admin, Apply to lets you choose This design to change only this quote, or Company defaults. Confirm local fire requirements before you rely on the defaults.
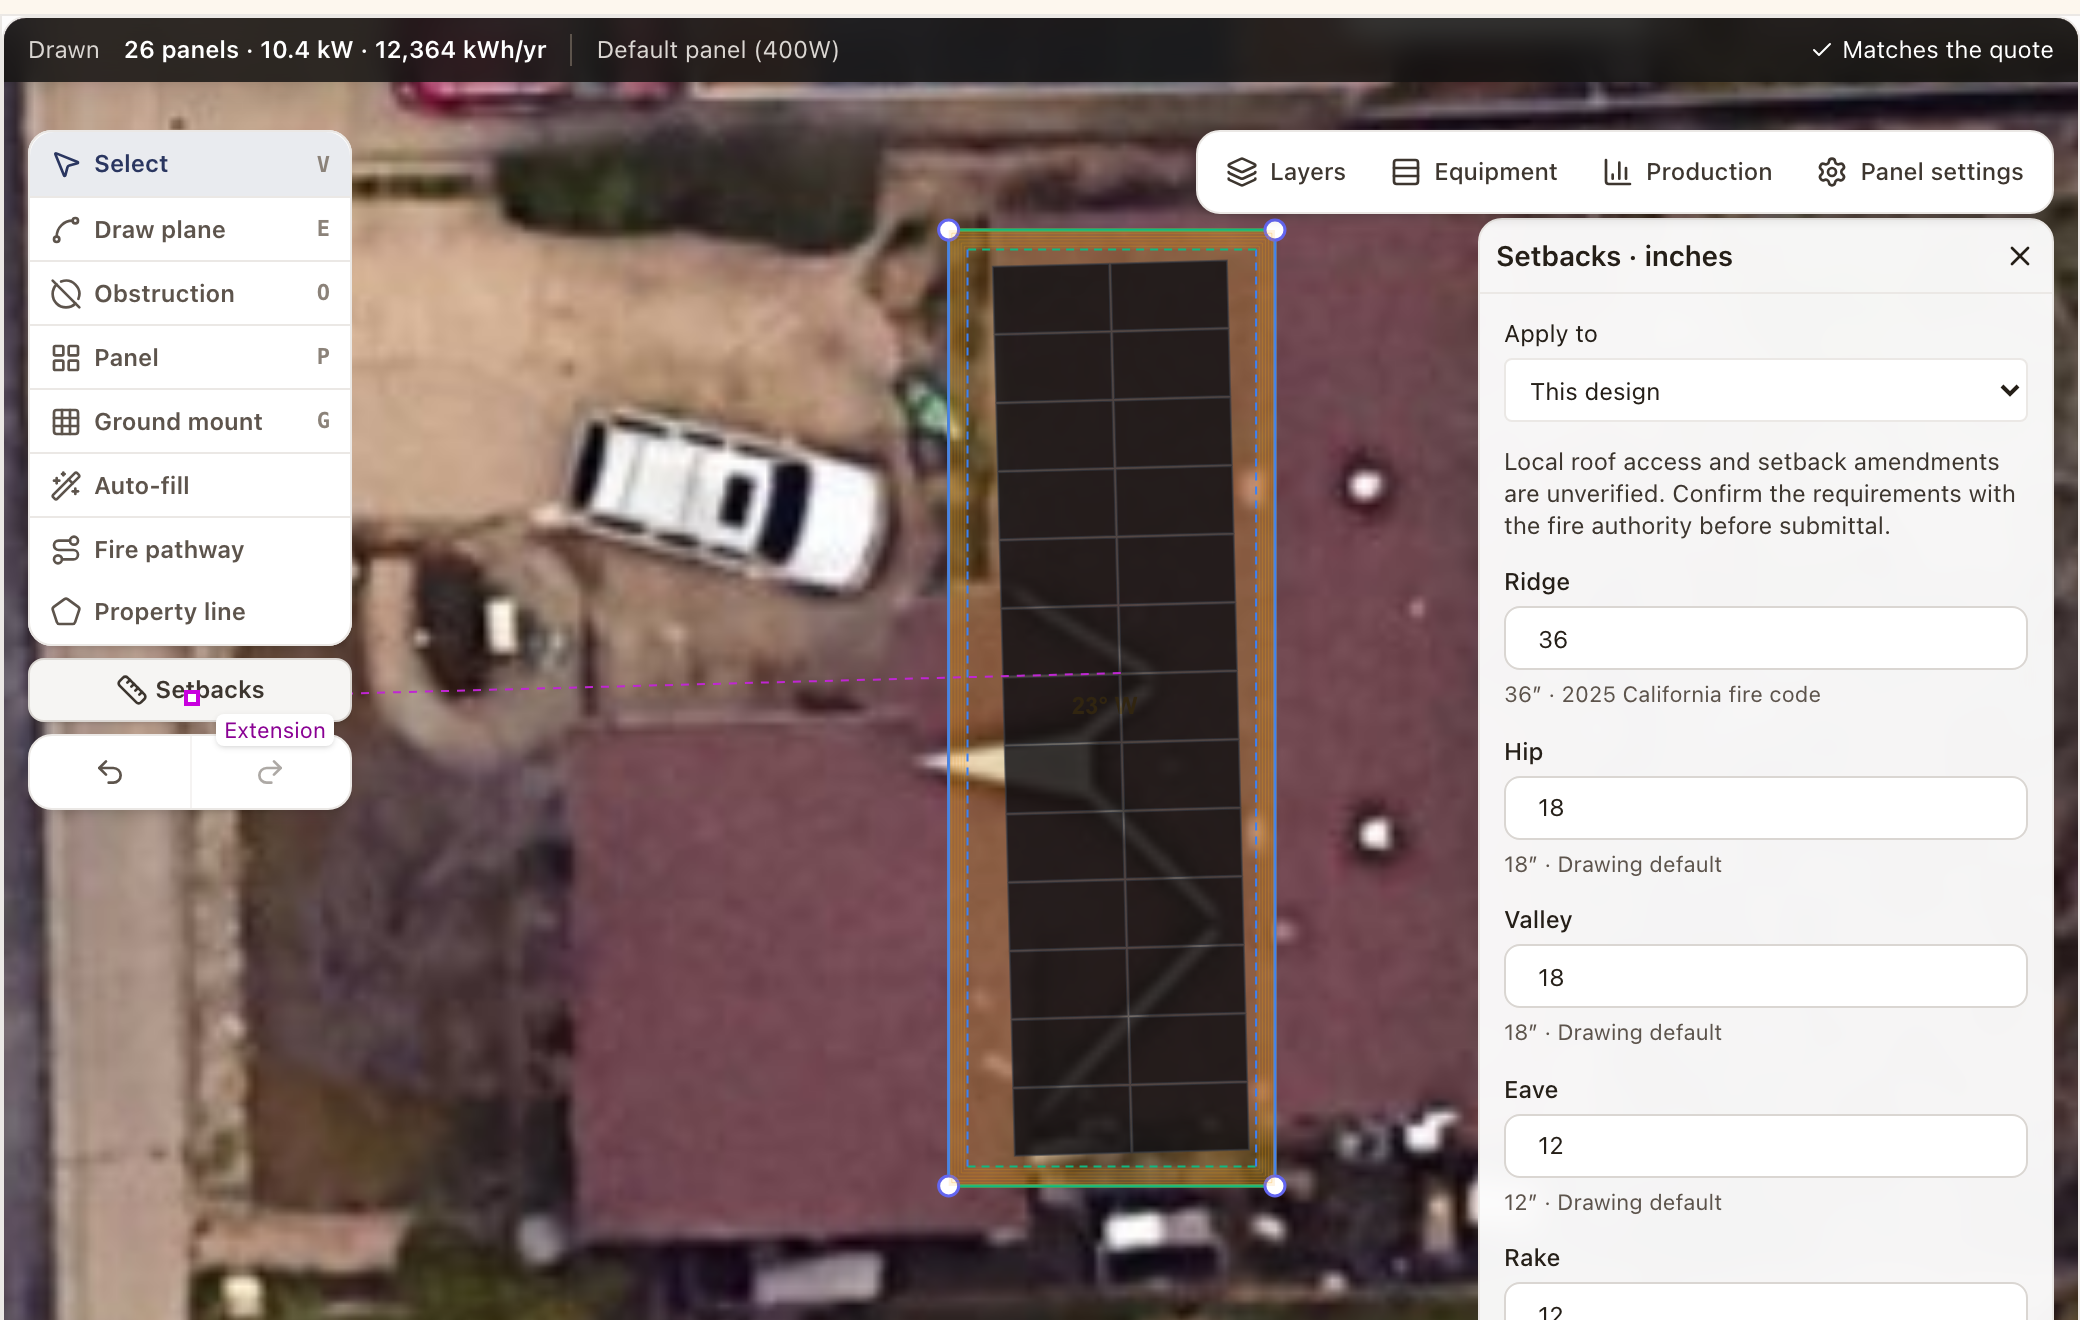
To mark a fire access path, click Fire pathway in the tool rail. Click at the eave, add bends as needed, and double-click at the ridge, or click Finish pathway. The card checks the path as you draw it, for example Runs from an eave to a ridge and Clear of panels and obstructions. It also shows how many pathways you have drawn and on how many planes, against the 2 on separate planes it asks for. To trace the parcel, click Property line, click each corner of the parcel, then click the first corner or Close boundary.
To trace a driveway, click Driveway. Set the Width in feet, which starts at 12. Click where the driveway meets the house, add bends as needed, and double-click at the street, or click Finish driveway. A planset's site plan draws it and labels it DRIVEWAY.
Review the equipment and production
- Configure shows the panel, then lists each array with its panels, size, and yearly production. Arrays drawn on the roof follow it; click the pencil beside one to set its shading, soiling, and snow losses. Under Inverters, click Add Inverter to pick one from your catalog. Batteries shows the quote's batteries; click Edit on Storage to change them. Set Panel output loss in the Production section at the bottom of Configure. If your company or the quote template set an Inverter for solar-only designs, it is added with the first panels, one microinverter per panel, and swapped for the battery's inverter when a default battery is added.
- Production shows the estimated annual production and the month-by-month production against the customer's consumption.
- Layers is a list of switches: Panels, Panel warnings, Obstructions, Setbacks, Measurements, Edge types, Sun exposure, and Panel sun exposure. Panel sun exposure colors each panel by yield. Hover over a panel to see its Production, Yield, and Solar access. A sun layer is greyed out when there is no sun data for the roof.
Apply the design to the quote
A message appears when the drawing and the quote's arrays differ: This design has changed since it was applied to the quote. Click Apply design to quote to price the quote from the new design. Click Keep quote arrays to leave the quote as it is. The design isn't changed either way.
Check it worked
- The top bar of the drawing shows Matches the quote.
- The builder's top bar shows the new System size and Production.
Common problems
- Undo a mistake. Press Ctrl+Z (Cmd+Z on a Mac), or use the arrows under the tool rail. Press ? on the drawing to see all shortcuts.
- Auto-fill leaves part of the roof empty. Setbacks and obstructions take space. Check the Setbacks panel, or place the remaining panels by hand. A plane that gets much less sun than the roof's best is also left empty, and its plane card says so. Use Clear & fill, or place panels on it by hand.