
Create and track an RMA
Track a piece of equipment out for a warranty return or replacement, from request through return, and invoice the manufacturer for the work.
An RMA tracks a warranty return or replacement for a piece of equipment. It covers the request to the manufacturer, their approval, the shipments, installing the replacement, and returning the faulty unit. When the manufacturer pays for the work, you invoice them from the RMA.
Before you start
You need the Owner, Admin, Operations Manager, or Operations User role.
Create an RMA
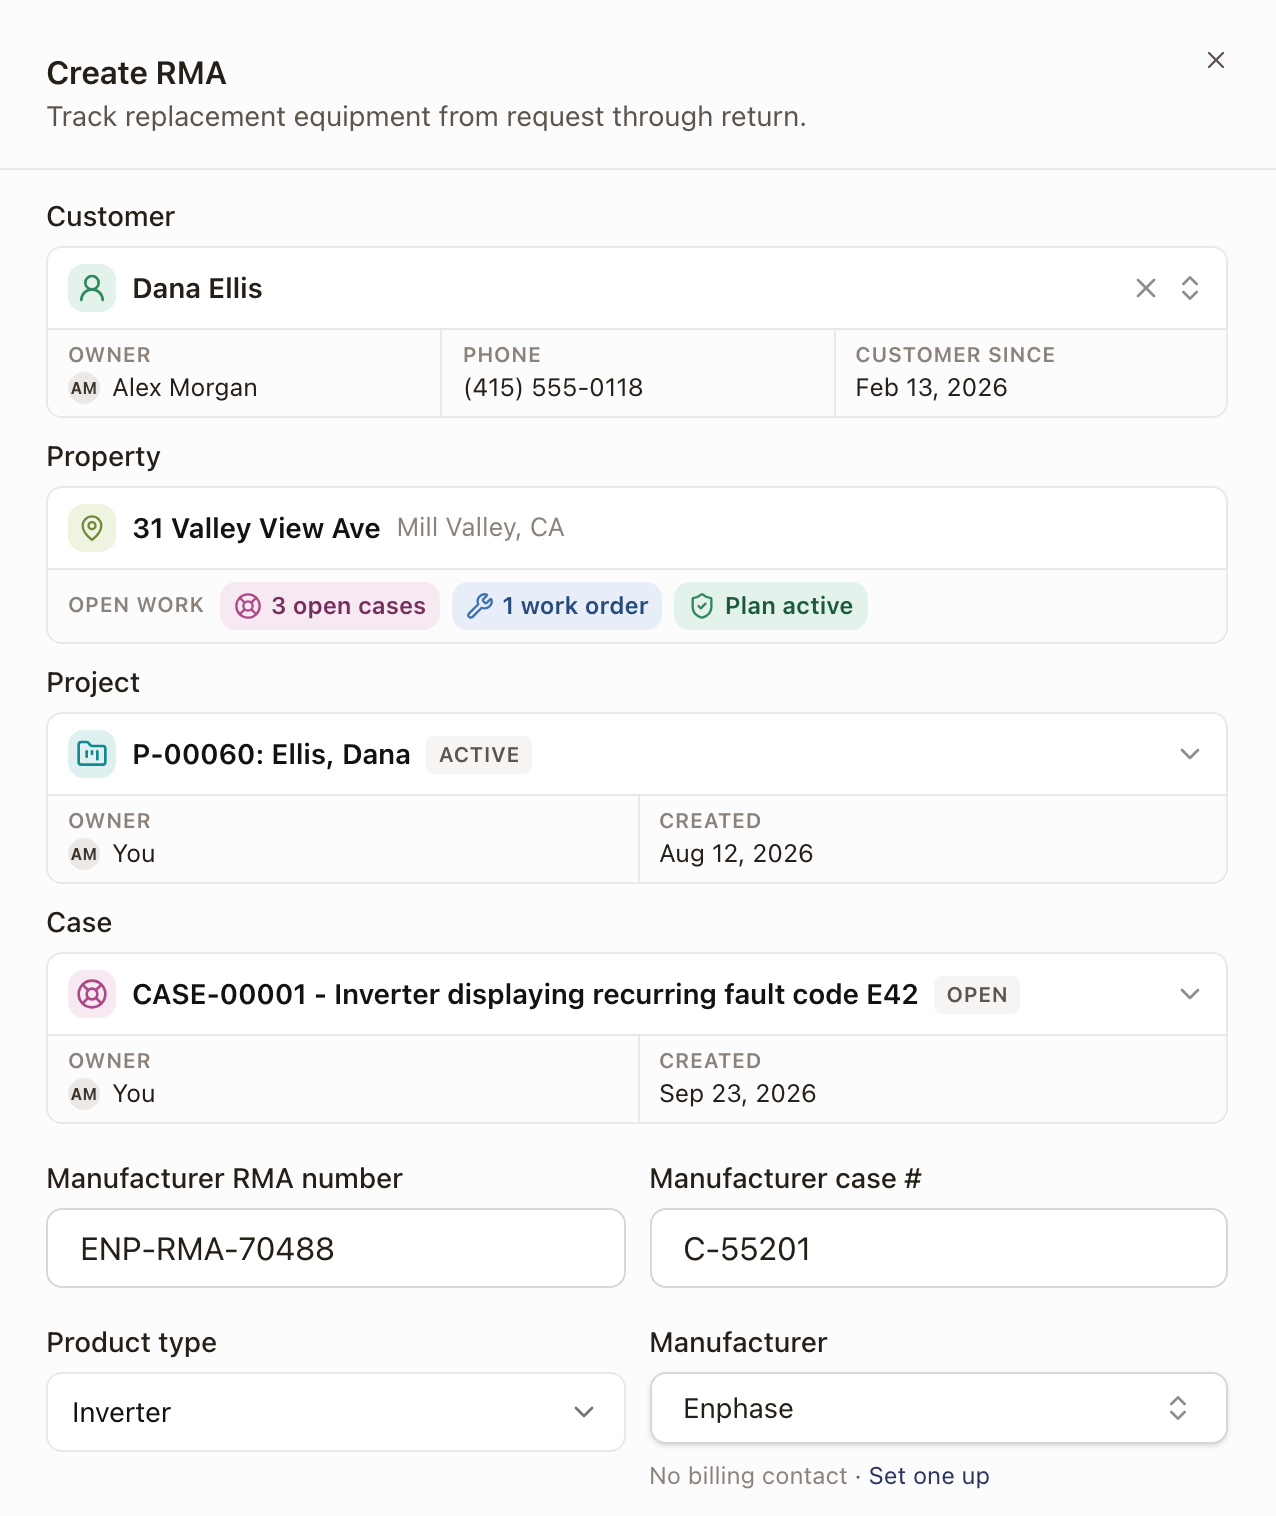
- On a Case, open the RMAs tab and click Add RMA. Or go to Operations → RMAs and click Create RMA.
- Pick the Customer, then the Project and Case it's for, if any. Each one shows as a card with its owner and a date. The Project list shows active and completed projects. Click Show under the list to add cancelled and closed ones. When you start from a Case, the customer, the case, and the case's project (if it has one) are filled in, and you can't change them. If the customer has more than one property and you pick neither a Case nor a Project with a property, pick the Property the RMA is for. Otherwise Property shows the one the RMA goes under, from the Case, the Project, or the customer's only property, and you can't change it.
- Fill in the Manufacturer RMA number and Manufacturer case # once the manufacturer gives them to you. Every RMA also gets its own number in your company, such as RMA-00042.
- Pick the Product type and the Manufacturer. Under the manufacturer, you see who you bill for its RMAs, or No billing contact.
- Add the Original serial and, once you have it, the Replacement serial.
- Add a Tracking number and Shipment ID once something ships.
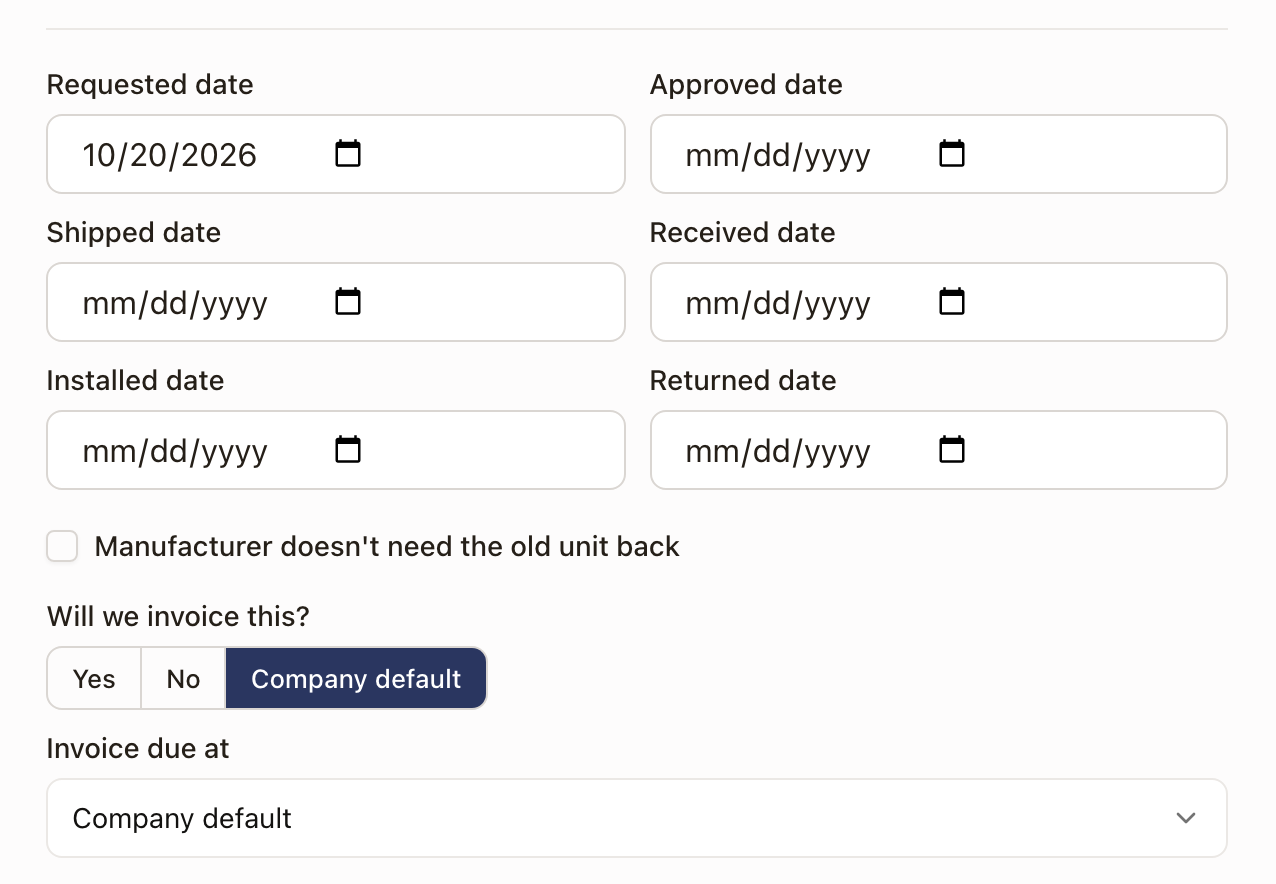
- Fill in the dates of any steps that already happened, such as the Requested date.
- Tick Manufacturer doesn't need the old unit back if the manufacturer told you so.
- Under Will we invoice this?, pick Yes or No only if this RMA differs from your company default. Leave it on Company default to follow it. Do the same for Invoice due at. See Invoicing and the company default below.
- Add Notes describing what's being returned and why.
- Click Create RMA.
Check it worked
From Operations → RMAs, the new RMA's page opens. From a Case, the RMA opens in a side panel and is listed on the Case's RMAs tab. It starts at the latest step that has a date. With no dates it starts at Not started, or at RMA issued if you entered a Manufacturer RMA number.
See an RMA on its case
A Case lists its RMAs on its RMAs tab. Each row shows the RMA's number, Manufacturer RMA #, Product, Manufacturer, Status, and Invoicing. Click a row to open the RMA. On a row that is Ready to invoice, click Create invoice at the end of the row. Only the roles listed above can open an RMA.
While the Case is open, What's happening now on its Overview tab also shows an RMA that is ready to invoice, or the first one still in progress, with a View RMA button.
Move it through its steps
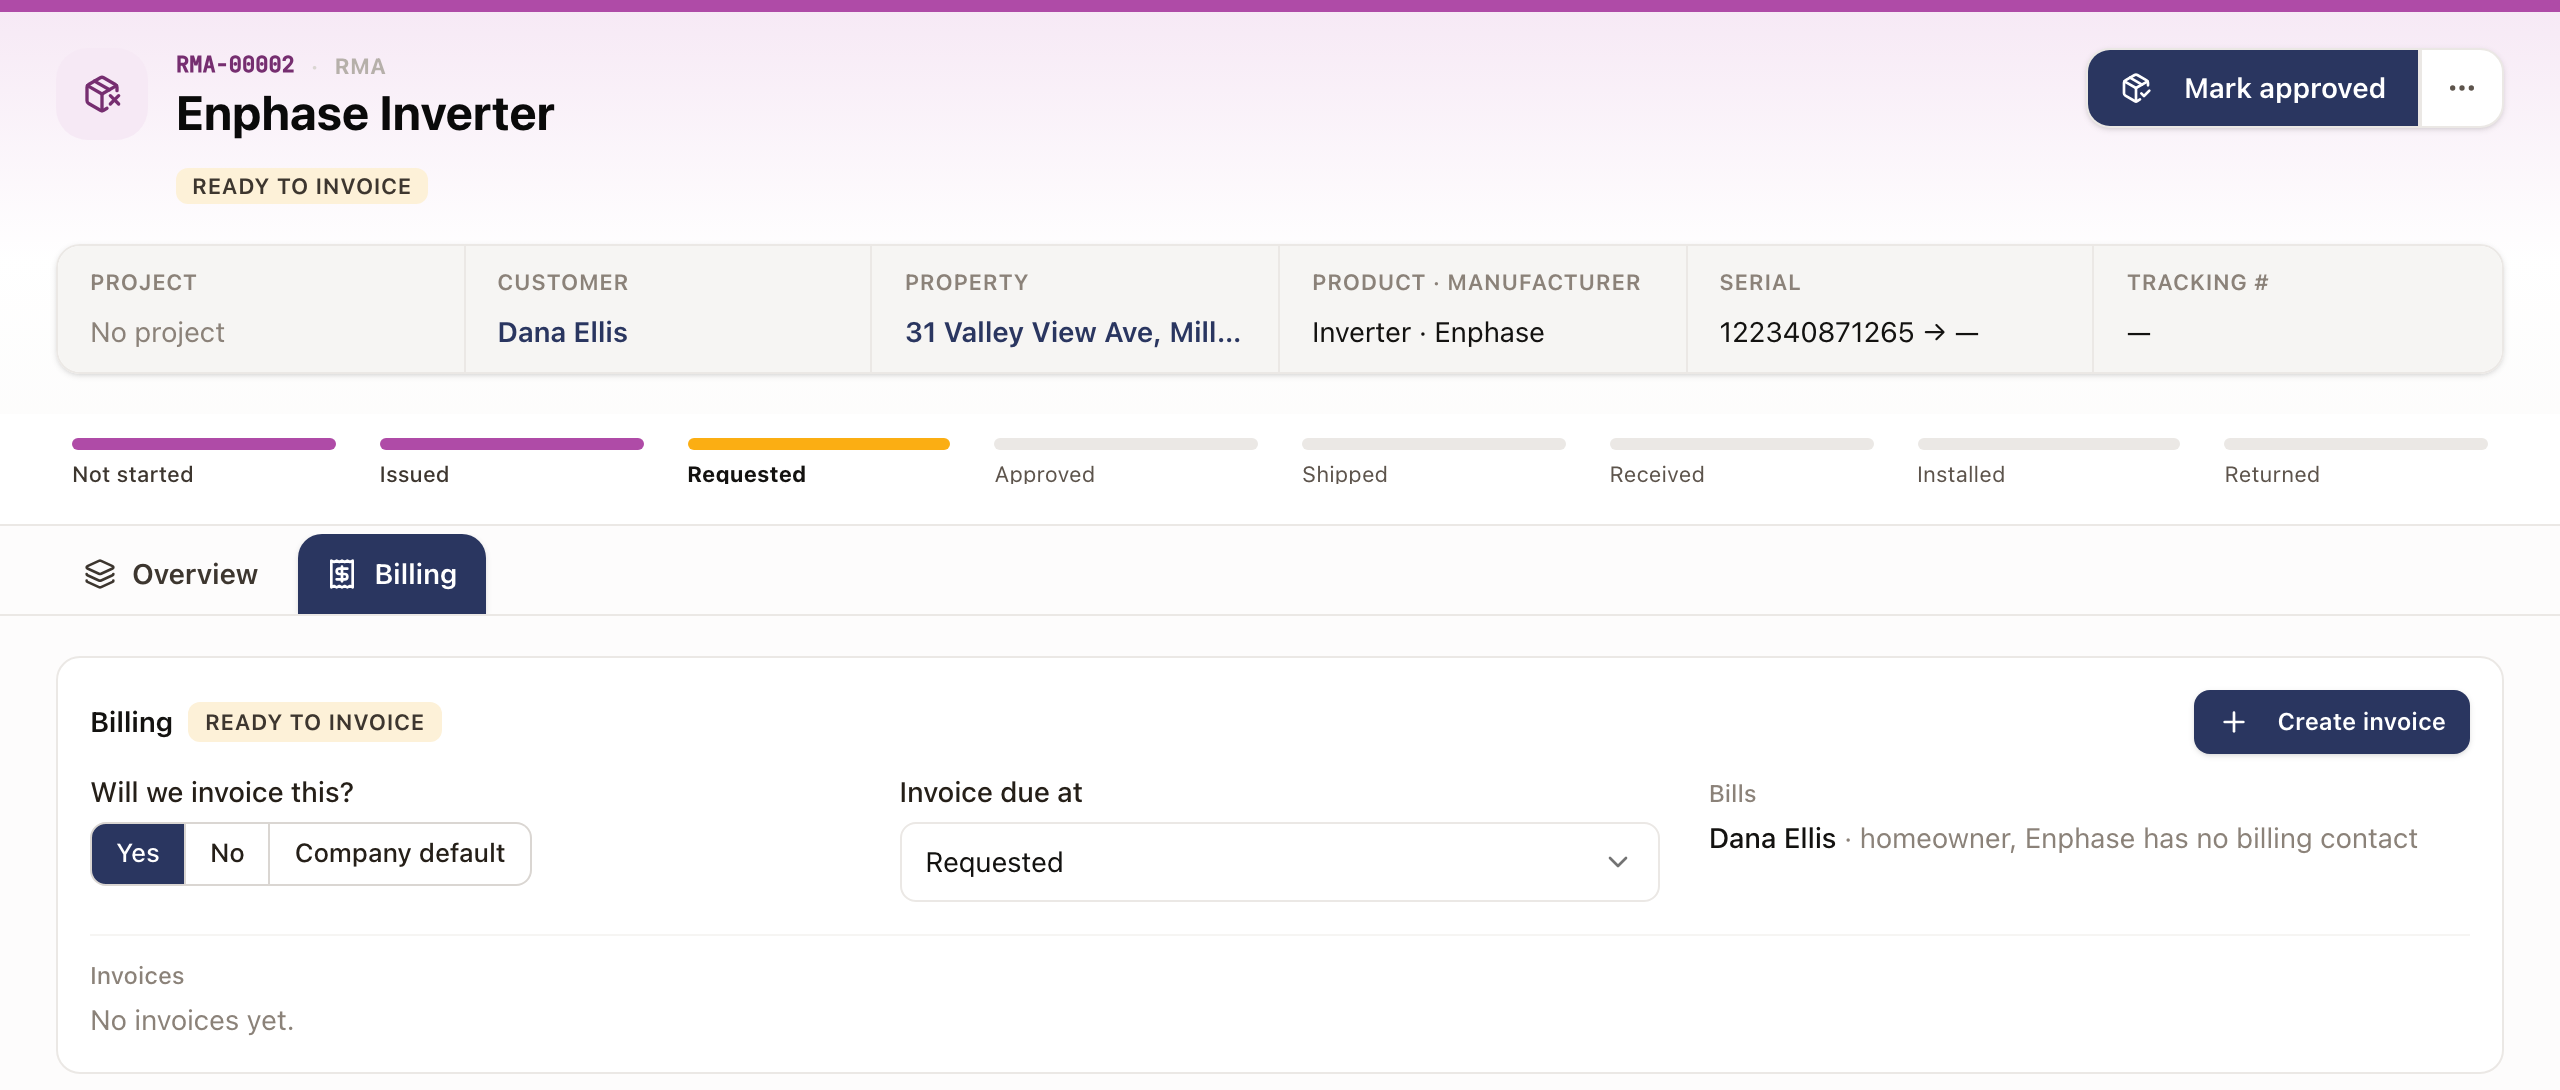
The status path under the RMA's header shows each step: Not started → Issued → Requested → Approved → Shipped → Received → Installed → Returned.
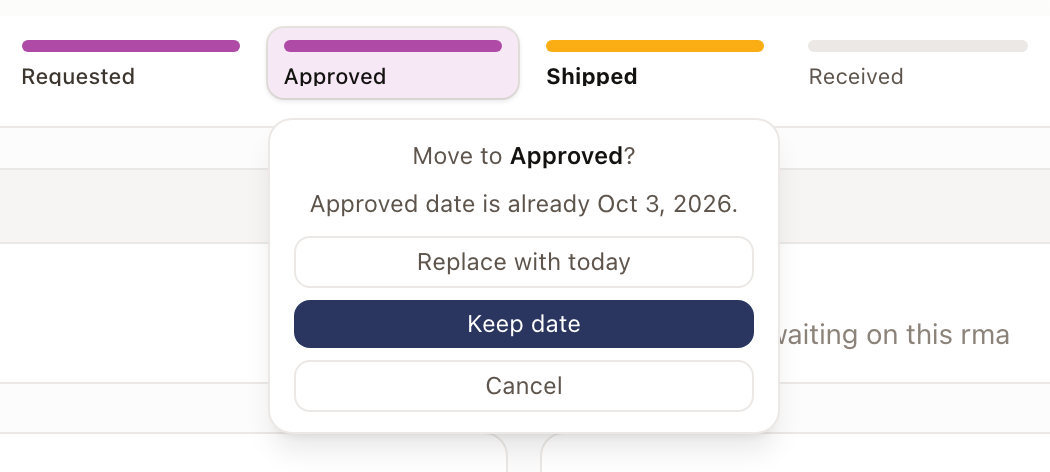
- Click a step to move the RMA there. If that step has no date yet, it gets today's date.
- If the step already has a date, you choose: Keep date moves the RMA and leaves the date as it is, Replace with today moves it and changes the date to today.
- You can move back to an earlier step. Later dates stay on the RMA.
- The button at the top right of the RMA's page, or at the bottom of the side panel, moves the RMA one step forward, for example Mark shipped. It asks the same question when the next step already has a date.
- Dates you type in Edit move the RMA forward to the latest step you filled in. Changing or clearing a date never moves it back.
The same status path shows in the side panel when you open the RMA from a Case or a project.
When the manufacturer doesn't need the old unit back
- On the RMA's page, click More actions (⋯), then No return needed. In the side panel, click No return needed under Shipping & return. You can also click Edit and tick Manufacturer doesn't need the old unit back.
- The status path now ends at Returned N/A instead of Returned.
An RMA that's already Installed moves to Returned N/A right away. Otherwise, Mark installed fills in the installed date and finishes the RMA as Returned N/A. If the old unit is returned after all, fill in the Returned date: a recorded return finishes the RMA as Returned.
Invoice the manufacturer
You need permission to create invoices. Owner, Admin, Operations Manager, and Operations User have it by default.
- Open the RMA and find Billing. In the side panel it is at the top. On the RMA's page, click the Billing tab.
- Click Create invoice. You can also click Create invoice at the end of the RMA's row on the Case's RMAs tab once the RMA is Ready to invoice.
- If a box opens first, read it. No manufacturer on this RMA lets you pick the Manufacturer and click Save and continue, or click Bill the homeowner. A box that reads, for example, Enphase has no billing contact lets you click Bill the homeowner, or Cancel and set up the billing contact first.
- The invoice is for the RMA's customer and site. Its first line describes the RMA: the Manufacturer RMA number, manufacturer case #, product type, serials, the homeowner's name, and the service address.
- Check who it bills. It starts with the manufacturer's billing contact as the payer, and says which manufacturer that contact is for. Use Bill someone else to pick a different payer.
- Enter the amount, then click Create as Draft, Create Invoice, or Create and Send.
The invoice shows under Invoices in Billing. It isn't added to the project's payment schedule, so it never counts toward what the homeowner owes on the project.
When moving an RMA reaches its Invoice due at step, a box reads, for example, RMA-00042 is ready to invoice. It shows Invoice due at and who the invoice Bills. Click Create invoice to start it, or Not now. You see this box only if you can create invoices.
To set a manufacturer's billing contact, see Set up your product and service catalog.
Invoicing and the company default
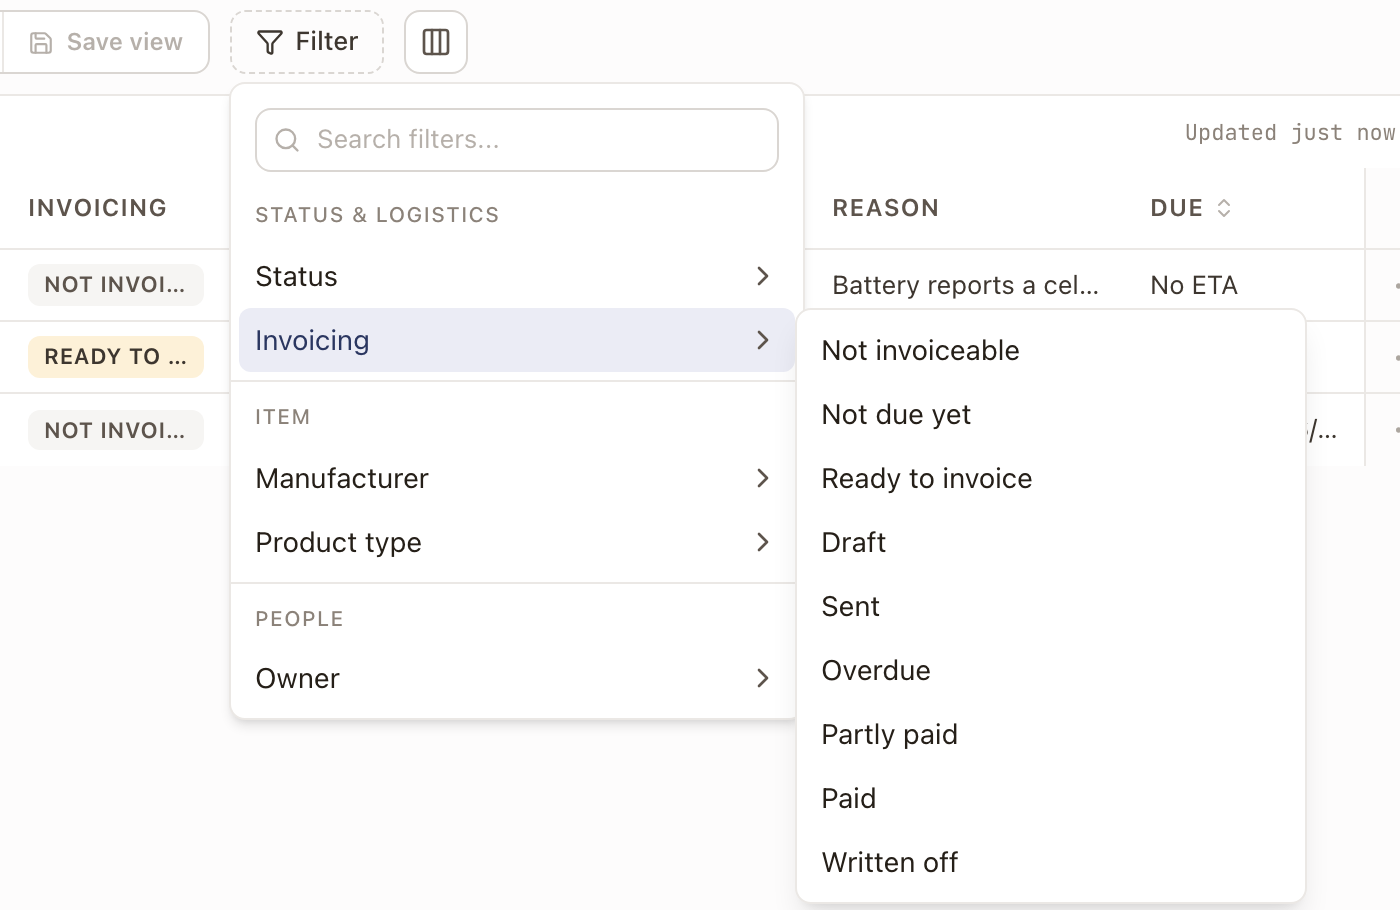
Each RMA has a Billing section, at the top of the side panel and on the Billing tab of the RMA's page. A label beside Billing says where the RMA stands: Not invoiceable, Not due yet, Ready to invoice, Draft, Sent, Overdue, Partly paid, Paid, or Written off. Under it, Will we invoice this? and Invoice due at say whether each value is the company default or was set on this RMA. Bills names who the invoice goes to.
An RMA that is invoiceable shows Ready to invoice once it reaches the step in Invoice due at. Then use Create invoice, as described above. After that, the section follows the invoice.
To set the company default:
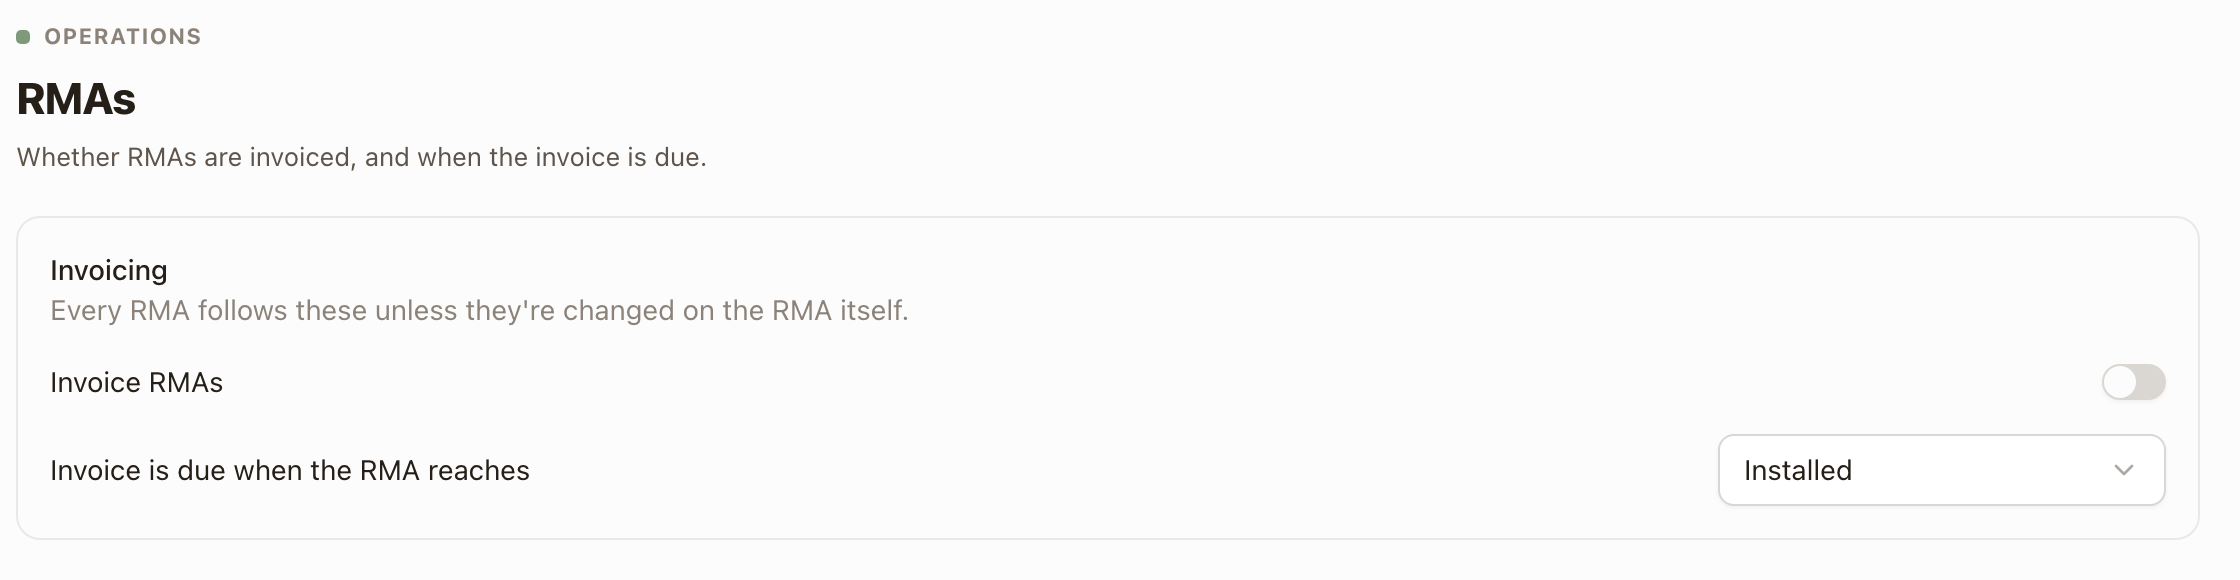
- Go to Settings → Operations → RMAs. You need the Owner or Admin role.
- Turn Invoice RMAs on or off.
- Under Invoice is due when the RMA reaches, pick Requested, Approved, Shipped to vendor, Received from vendor, Installed, or Returned or Returned N/A.
To change one RMA, go to its Billing section. Under Will we invoice this?, pick Yes or No. Set Invoice due at to a step. Each change saves as soon as you make it. Pick Company default to follow the company setting again. Beside it, the label shows the company's current value, for example Company default (Yes).
Add files to an RMA
On the RMA's Overview tab and in its side panel, Documents holds the RMA's files. Click Upload, drag files onto the section, or click Add link for a file kept somewhere else. The files also show on the property's Media tab, under RMAs, and in the project's media. Customers don't see them.
Find an RMA
Operations → RMAs lists RMAs with their Number, Manufacturer RMA number, customer, status, invoicing, owner, item, reason, and due date. An RMA's Owner is the owner of its project, or else the owner of its Case. It reads Unassigned when it has neither. Click the Owner heading to sort by owner. People who can view invoices can also turn on an Invoice column from the columns button. Finished RMAs, Returned and Returned N/A, are left out of the default list. Use Filter to narrow the list by Status, Invoicing, Manufacturer, Product type, or Owner. Under Owner, pick a person or Unassigned. Filter Status to Returned or Returned N/A to see finished RMAs. Filter Invoicing to Ready to invoice to see the RMAs that need an invoice now. Turning on Invoice RMAs also adds a To invoice view that shows them.
Common problems
- An RMA you finished isn't in the list. Finished RMAs are left out by default. Use Filter and set Status to Returned or Returned N/A.
- There's no Mark button on the RMA. At Not started, the RMA has no next step yet. Add the Manufacturer RMA number in Edit, or click a step on the status path.
- The invoice bills the homeowner instead of the manufacturer. The RMA has no manufacturer, or the manufacturer has no billing contact. A box asks before the invoice opens. Pick the manufacturer, or set the billing contact in Settings → Sales → Products & services → Manufacturers. You can also pick the payer with Bill someone else on the invoice.
- You can't delete an RMA. It has invoices. Void them, then delete the RMA. On the RMA's page, use More actions (⋯), then Delete. In the side panel, click Edit, then Delete RMA.
- Create invoice isn't there. You need permission to create invoices. Owner, Admin, Operations Manager, and Operations User have it by default.