
Invite your team and set roles
Invite teammates, understand the built-in roles, and build a custom role if none of them fit.
Every teammate needs a login and a role. Roles decide what they can see and do, including whether they can open Settings at all.
Before you start
You need the Owner or Admin role to send invitations or manage roles.
Invite a teammate
- Go to Settings → Users.
- Click Invite User.
- Fill in First Name, Last Name, and Email Address.
- Pick a Role. Built-in roles are grouped by department; your organization's custom roles appear under their own group, each labeled with the base role it's built on.
- Click Send Invitation.
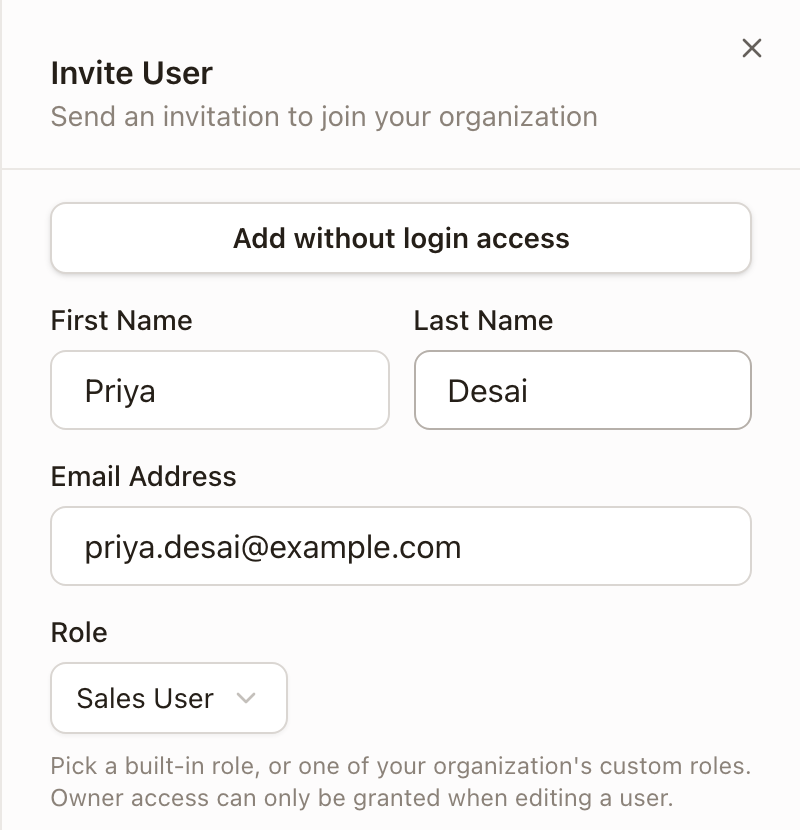
If the email was already invited, you'll see an option to resend that invitation instead of sending a new one.
To add someone who doesn't need to sign in yet, click Add without login access at the top of the drawer, fill in the details, and click Add User. You can invite them later from the user list.
Track invitations
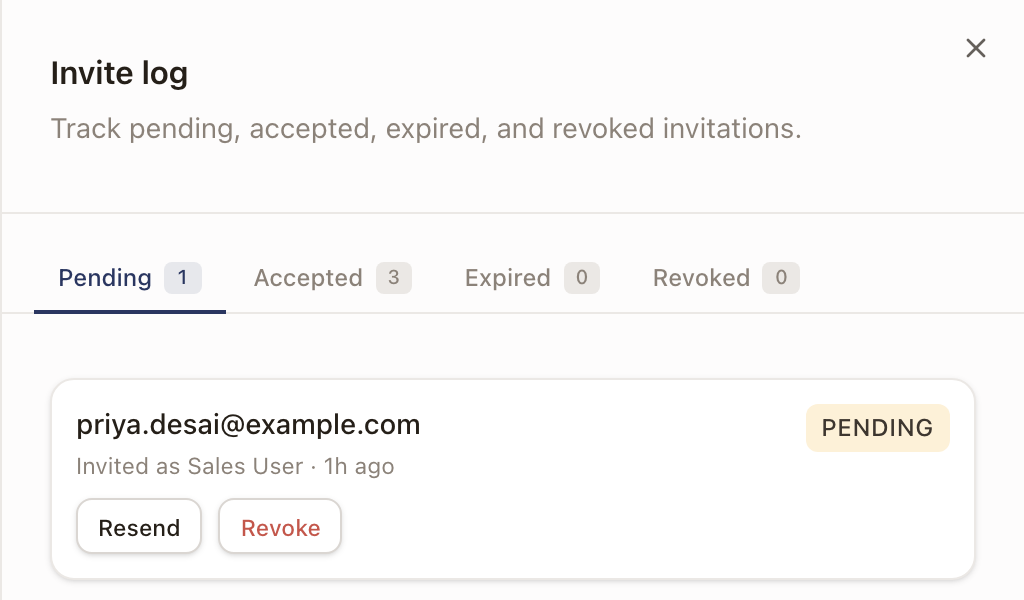
Click Invite log next to Invite User to see every invitation, grouped into Pending, Accepted, Expired, and Revoked, with Resend and Revoke actions on pending ones.
Edit a team member
Use the Edit user drawer to change someone's details, role, scheduling, notifications, and account. It saves as you go, so there's no form to submit.
- Go to Settings → Users.
- Open the person's row menu and click Edit user.
- Pick a section from the list on the left: Profile, Role & access, Scheduling, Territories, Notifications, Integrations, or Account.
The header shows the person's name, role, and status. Text fields save about a second after you stop typing. Switches, role changes, colors, working days, and territories save as soon as you change them. Next to Save, the header reads Saving…, then All changes saved. Click Save to save right away. If something can't be saved, closing the drawer asks Discard unsaved changes?: click Keep editing to fix it, or Discard.
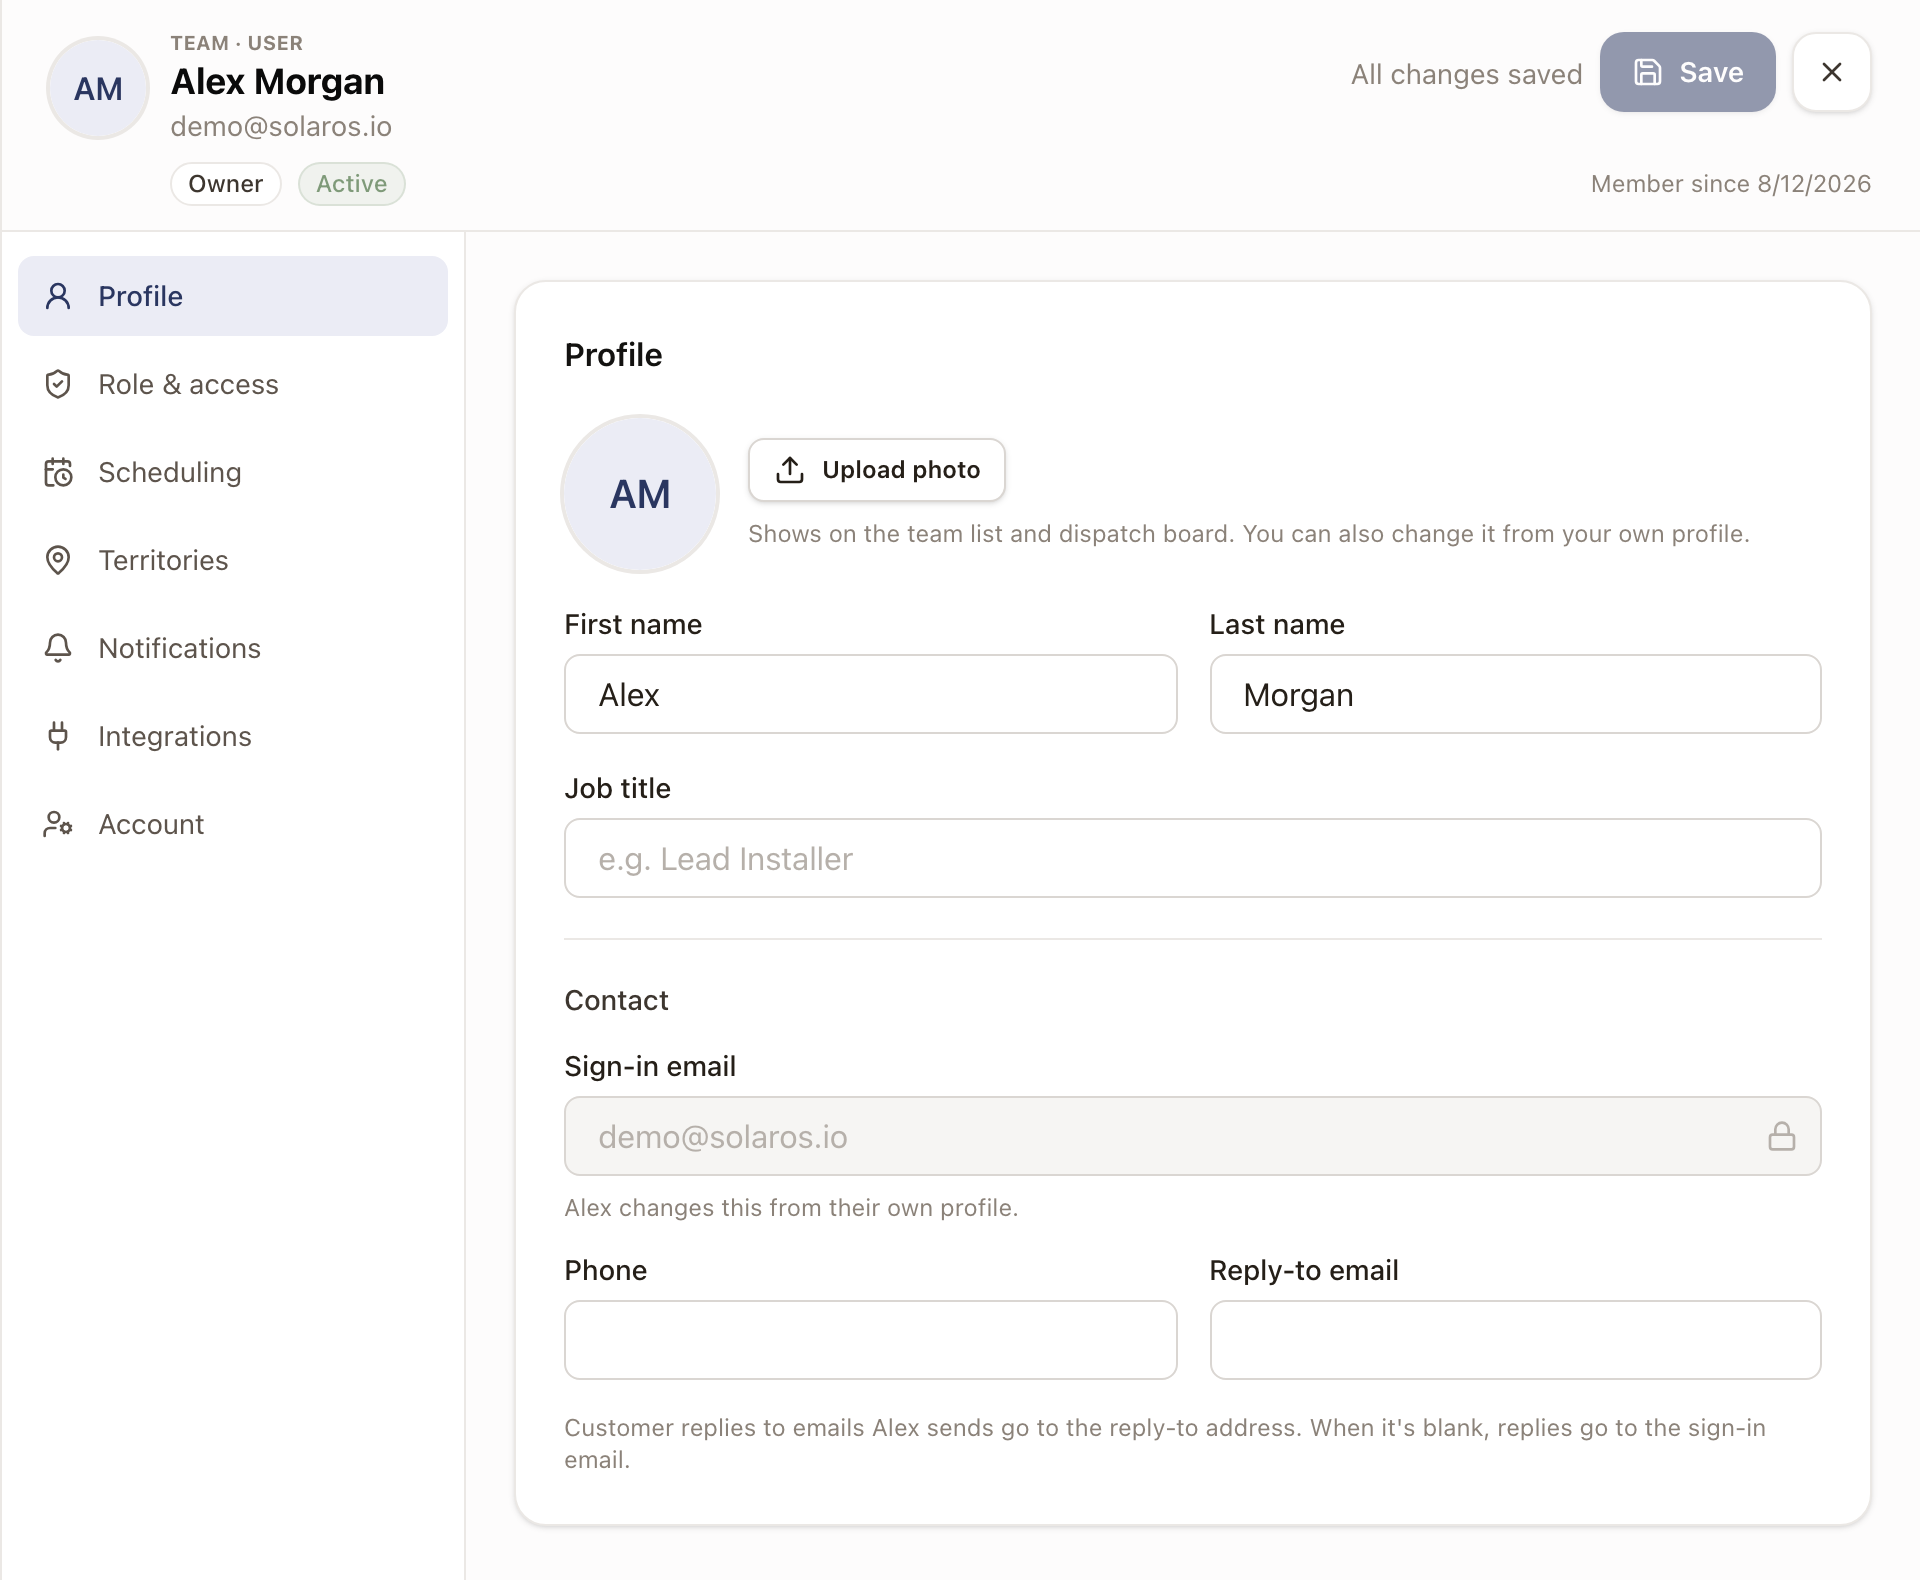
Profile. Upload photo (or Replace photo and Remove) sets the picture shown on the team list and the Dispatch Board; it's available once the person has accepted their invitation. Also set First name, Last name, Job title, Phone, and Reply-to email, where customer replies to emails they send go. Sign-in email is read-only; each person changes it from their own profile.
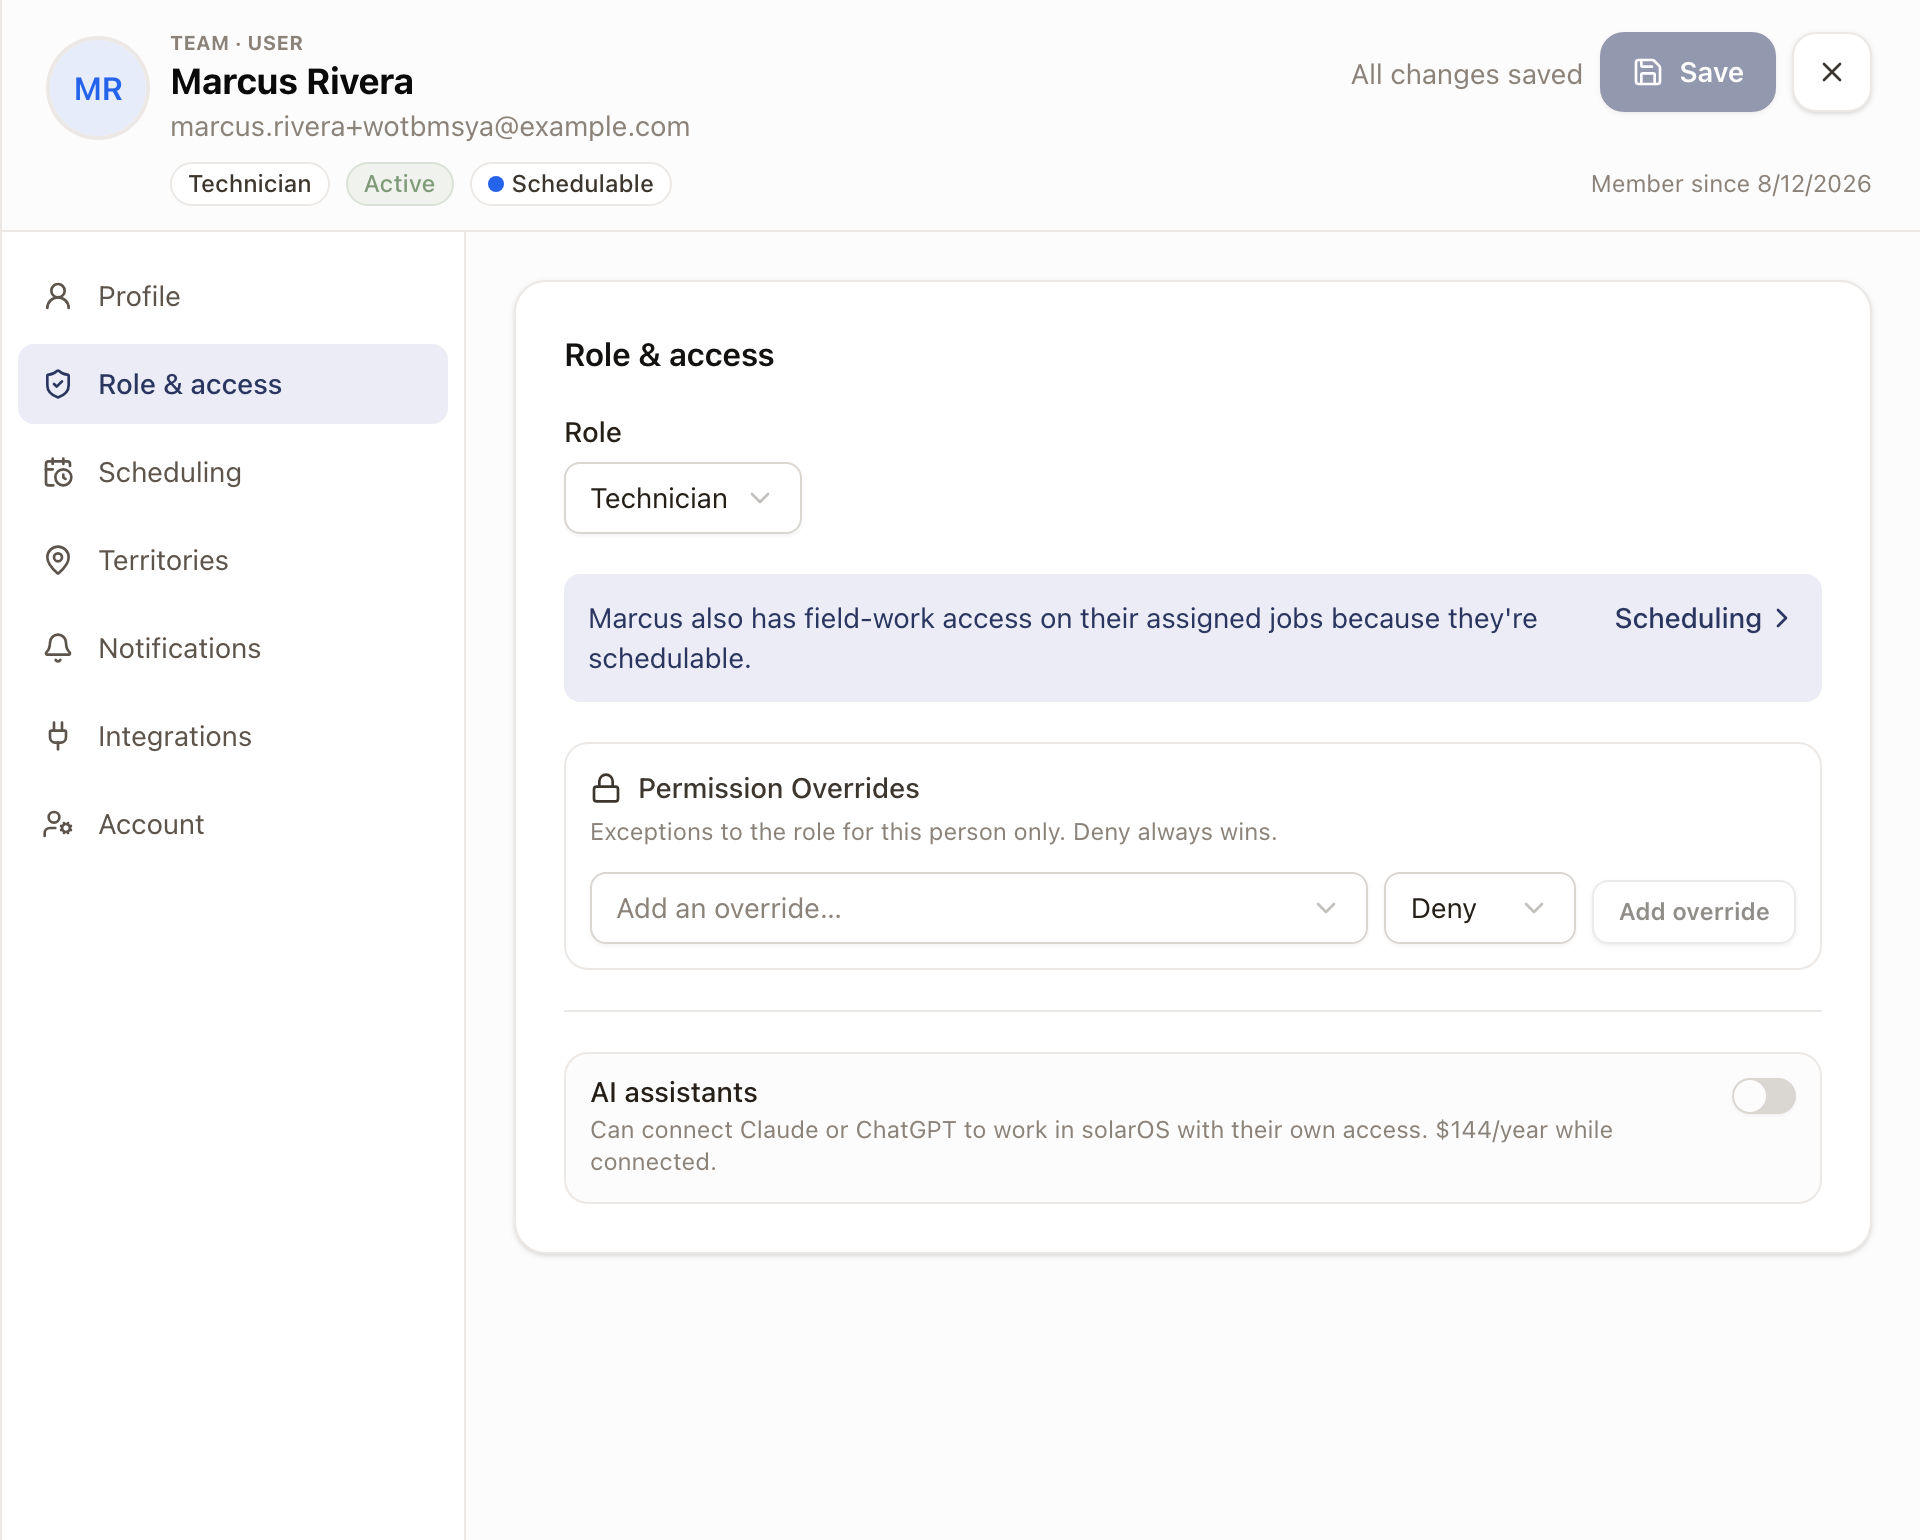
Role & access. Change Role; solarOS asks you to confirm before it saves. You can also add Permission Overrides for this person only. Deny always wins over what their role allows.
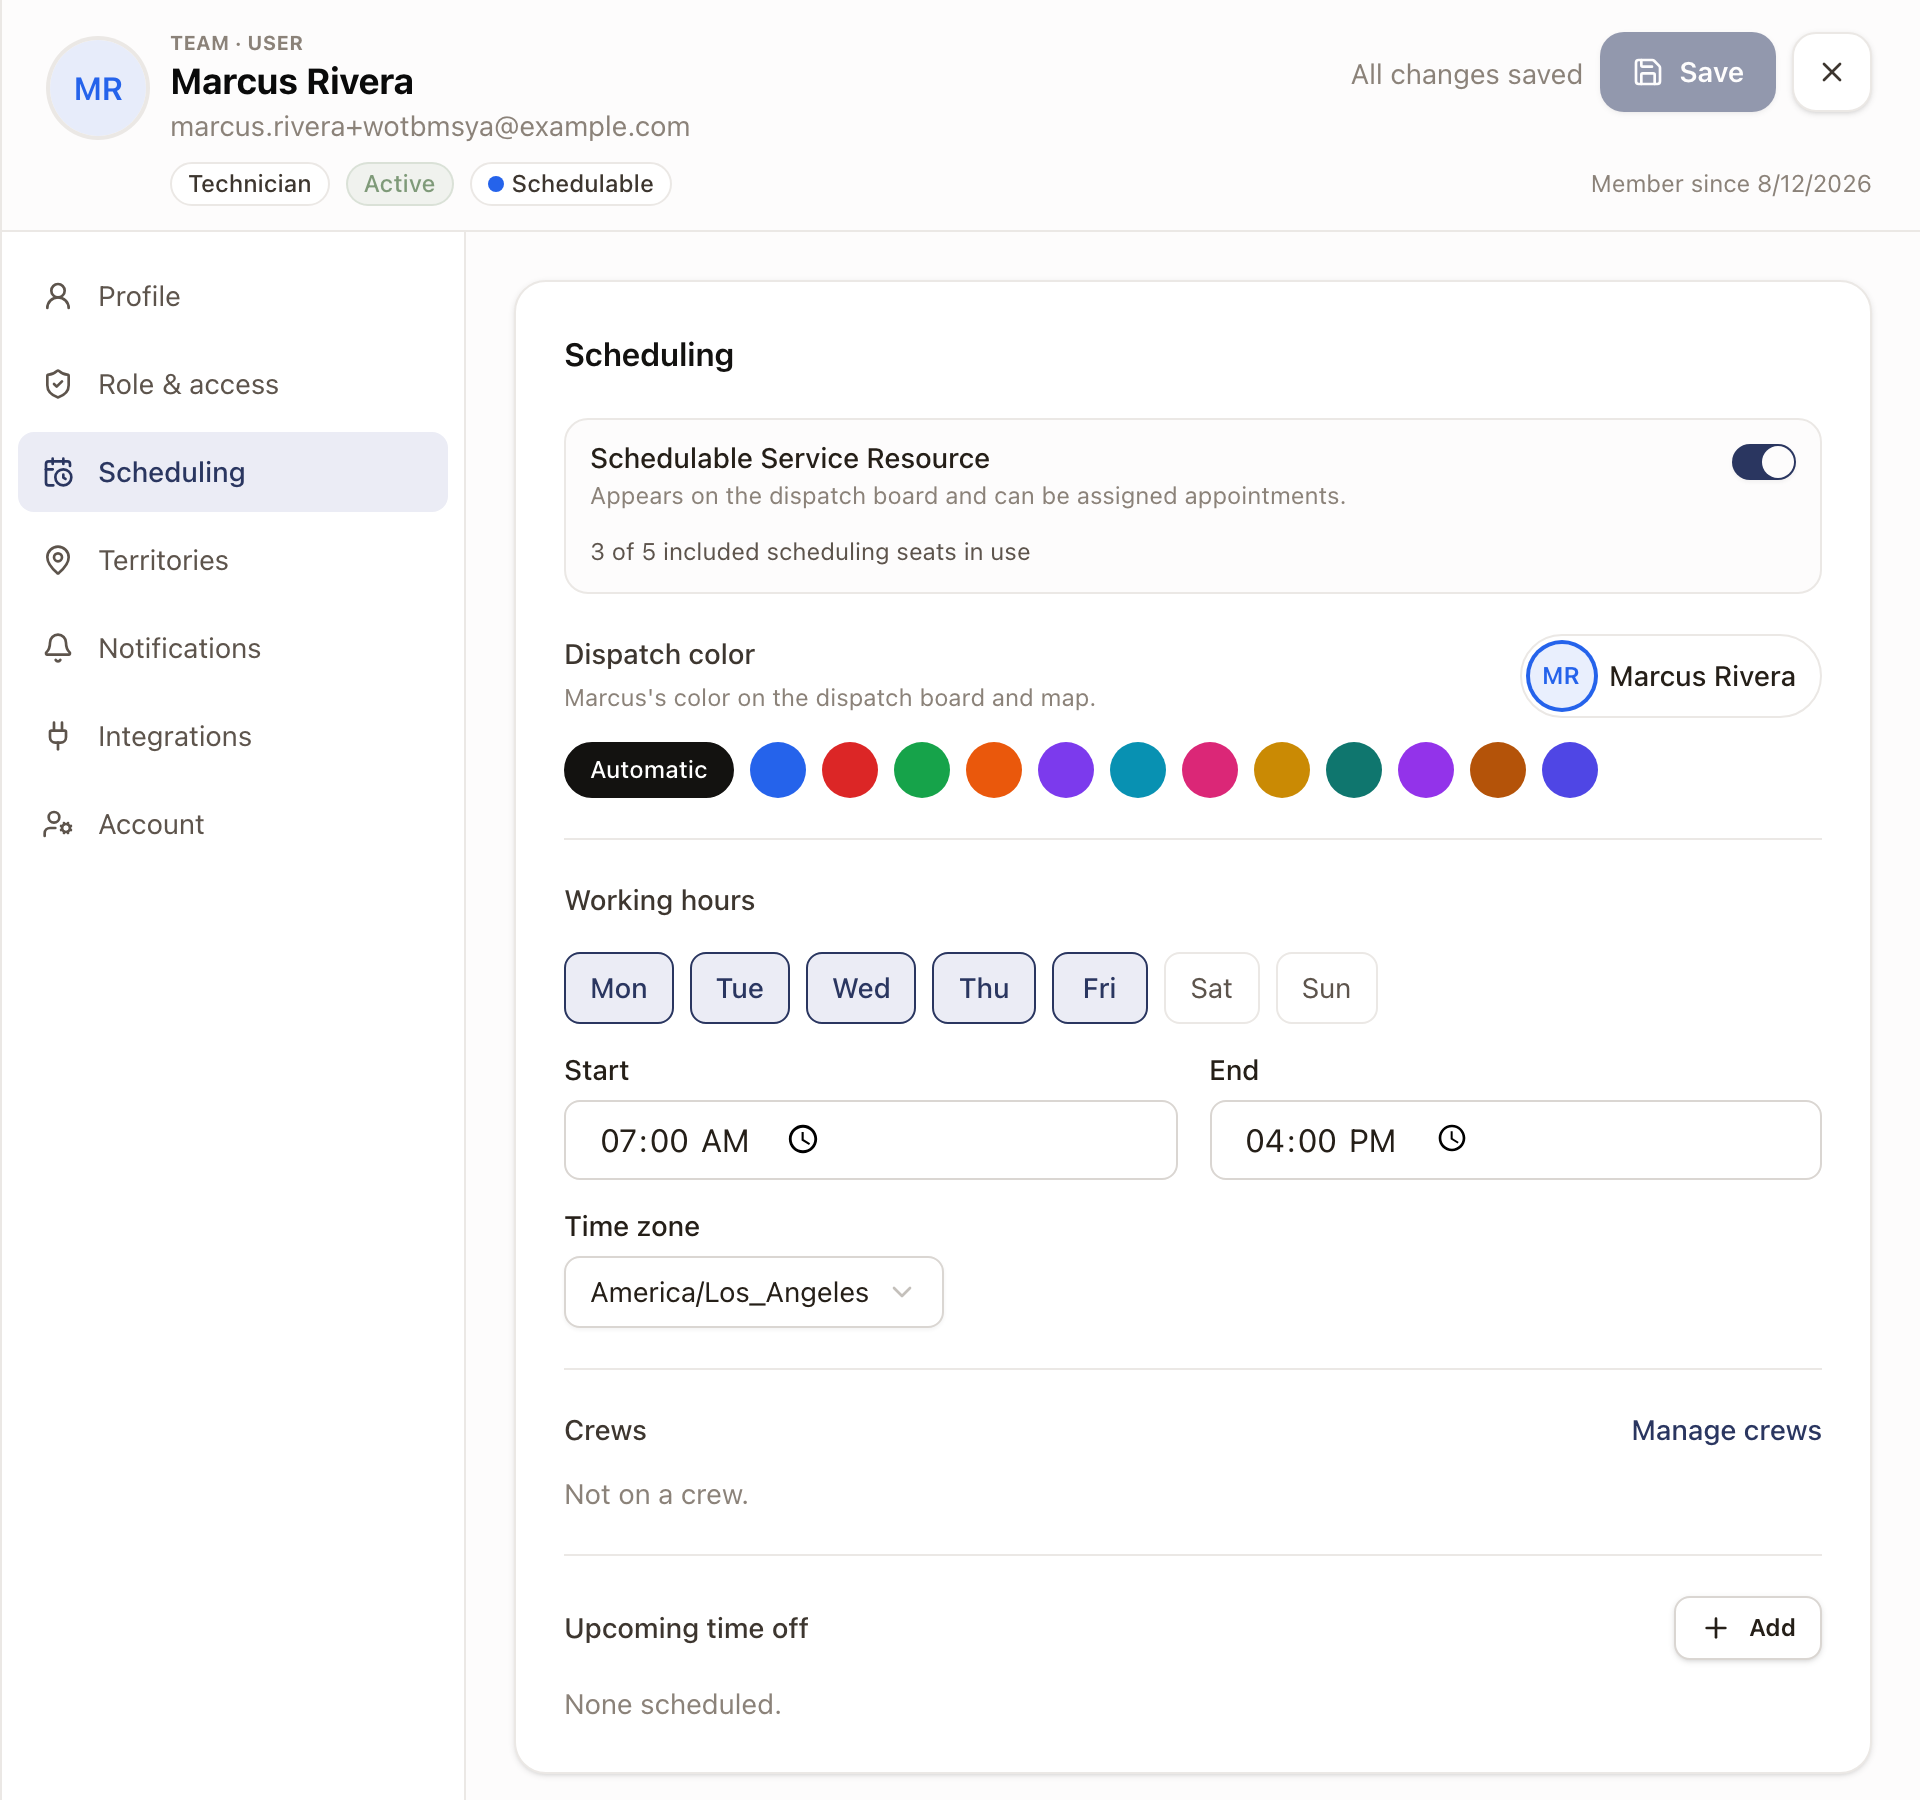
Scheduling. Turn on Schedulable Service Resource for people who appear on the Dispatch Board and take appointments. solarOS asks you to confirm, and if your included scheduling seats are used up, it offers a paid seat first. Once someone is schedulable you can also:
- Pick their Dispatch color, either Automatic or one of the color swatches. It's their color on the Dispatch Board and map.
- Set Working hours: the days they work, Start, End, and Time zone.
- Review Upcoming time off, the next few absences. Click Add to block time off for them.
Territories. Choose the territories they cover and their homebase. See Set up territories.
Notifications. Set their notification choices for them. See Choose which notifications your team gets.
Integrations. Enter their Slack and Salesforce IDs.
Account. See their status, when they joined, when they last signed in, and whether two-step verification is set. You can click Send login link to email them a one-time sign-in link, or Deactivate to stop them signing in while keeping their records. Someone credited as the Originator on any lead, opportunity, or quote can't be removed from the team, so use Deactivate for them.
Turn on AI assistants for a team memberBeta
In Role & access, the AI assistants switch lets a person connect Claude or ChatGPT to work in solarOS with their own access. Turning it on opens Turn on AI assistants for the person's name, which shows the price that adds to your subscription while an assistant is connected. Click Turn on AI assistants to confirm. Turning it off disconnects their assistants and ends their seat. See Connect an AI assistant. Contact solarOS support to turn it on for your company.
See a team member's crewsBeta
For a schedulable person, the Scheduling section has a Crews list showing the crews they're on, with a Lead tag on crews they lead. It's read-only; click Manage crews to change crew membership. See Crews. Contact solarOS support to turn it on for your company.
The built-in roles
| Role | What it's for |
|---|---|
| Owner | Full access to everything, including ownership of the organization. |
| Admin | Manages users, custom roles, per-user permissions, and security policy. |
| Sales Manager | Manages the sales org: full CRM, pipelines, quote approvals, and sales reports. |
| Sales User | Owns their own pipeline, leads, opportunities, and quotes. |
| Operations Manager | Broad read and write across most of Operations, plus monitoring configuration. |
| Operations User | Broad read and write across most of Operations, without destructive or manager-only actions. |
| Technician | Runs their own assigned work orders and submits reports. |
| Member | Read-only access to their own records. |
Only Owner and Admin can open Settings by default. Every other role, including Sales Manager and Operations Manager, is blocked from the whole Settings area unless a custom role explicitly adds that access.
For the full list of what each role can do, see the Permission matrix.
Build a custom role, if none of these fit
Go to Settings → Roles and click Create custom role. The wizard:
- Choose Base Role: pick one of Admin, Sales Manager, Sales User, Operations Manager, Technician, or Member. Your new role starts with every permission that role has, copied in full; changing the base role's permissions later doesn't carry over to roles already created from it.
- Name & Description.
- Customize Permissions: toggle page access, then record visibility and actions, grouped by area.
- Review & Confirm.
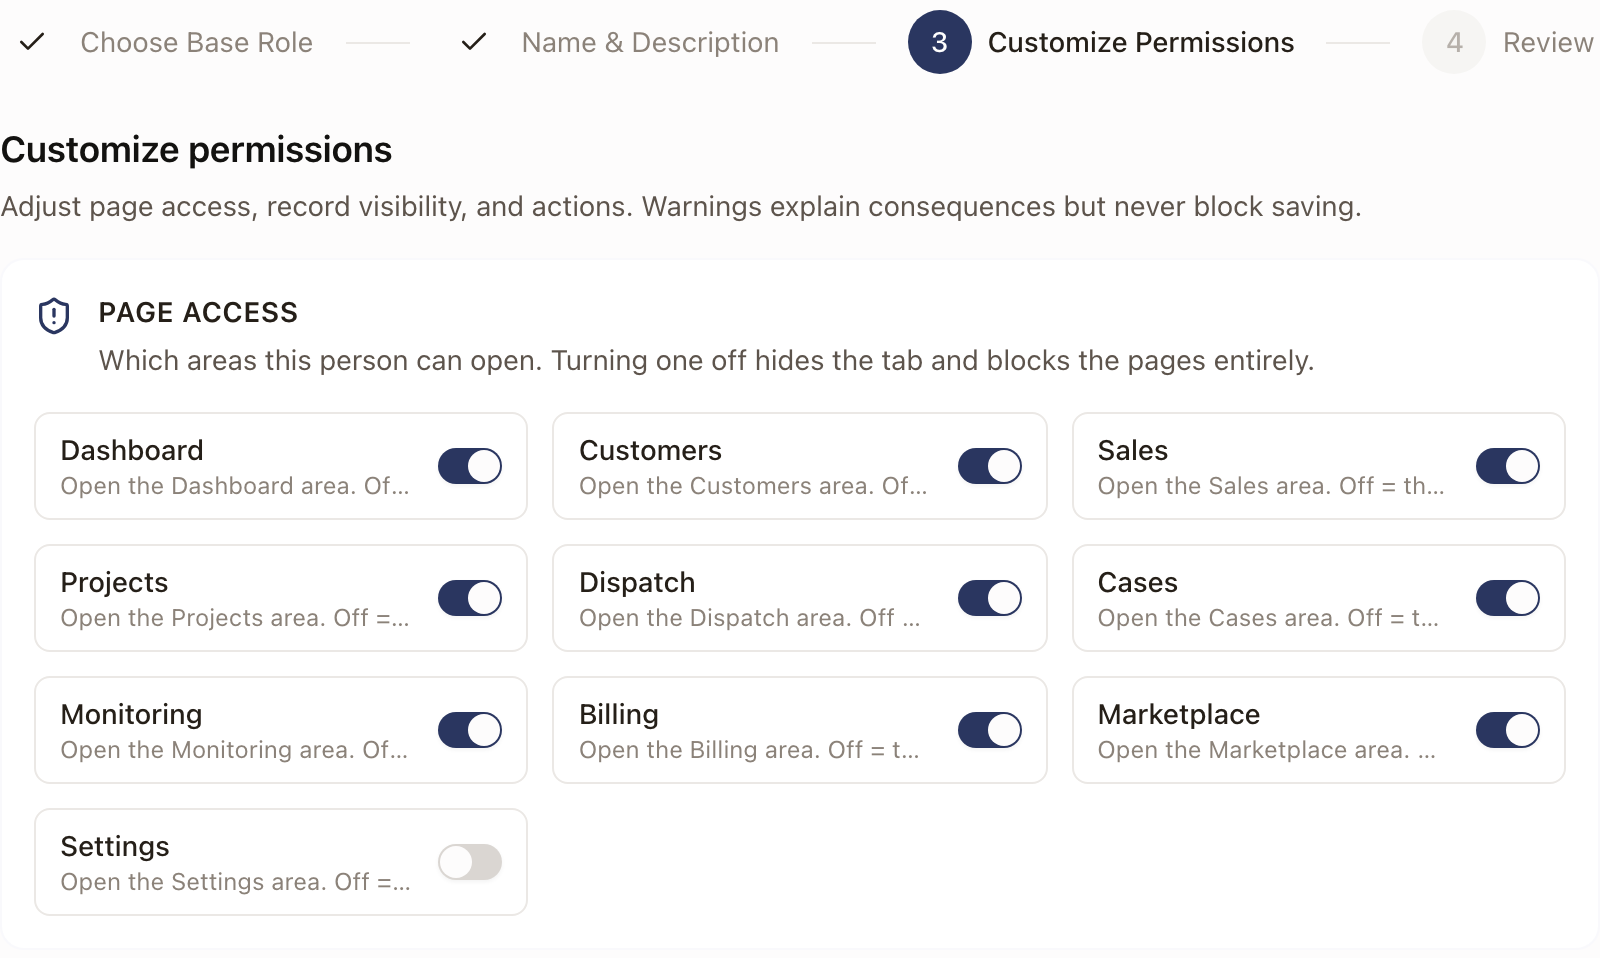
If you want this role to reach Settings, turn on the Settings page-access toggle in step 3; it isn't on by default even for a role based on Operations Manager.
Project roles
Separately from the roles above, Settings → Project roles sets who owns each kind of work on a project: named slots like Designer, Permit Coordinator, Procurement, Scheduler, and Finance, plus a Project Manager at the center. Each slot defaults to a shared Queue rather than a specific person; set a specific person only if a role should always land on the same teammate. Record kind defaults then lets you choose which of those slots owns each kind of work item (Permit, Work Order, Task, and so on) by default.
Departments
To group teammates, for example Client Services or Service, so lists and the Operations dashboard can be filtered by them, go to Settings → Team → Departments. See Group your team into departments.
Check it worked
An invited teammate appears with a PENDING INVITE status on Settings → Users until they accept, then ACTIVE. A custom role appears in Settings → Roles with its member count and a Duplicate option.
Common problems
A teammate says they can't see Settings. That's expected for every role except Owner and Admin. Give them a custom role with the Settings page-access toggle on if they need it.