Slot in work from the map
Pick an unscheduled job on the Dispatch Map and add it to a technician's day, between the stops they already have.
When you plan a day by where the jobs are, use the Map view. Turn on unscheduled work, click a pin, and the board suggests where that job fits in each technician's route. You review the suggestion and add the job in one step.
Before you start
- The Owner, Admin, Operations Manager, or Operations User role.
- A work order that is ready to schedule, with an address the map can place.
- A technician with at least one stop on the day you're planning. The map suggests spots only on days that have stops.
- Today or a later day. Past days don't offer this.
Show the unscheduled work
- Go to Operations → Dispatch Board and click Map.
- Use the arrows to choose the day, or click the date at the top of the board and pick one.
- In the panel at the top left of the map, turn on Show unscheduled work. The number beside it is how many ready work orders there are.
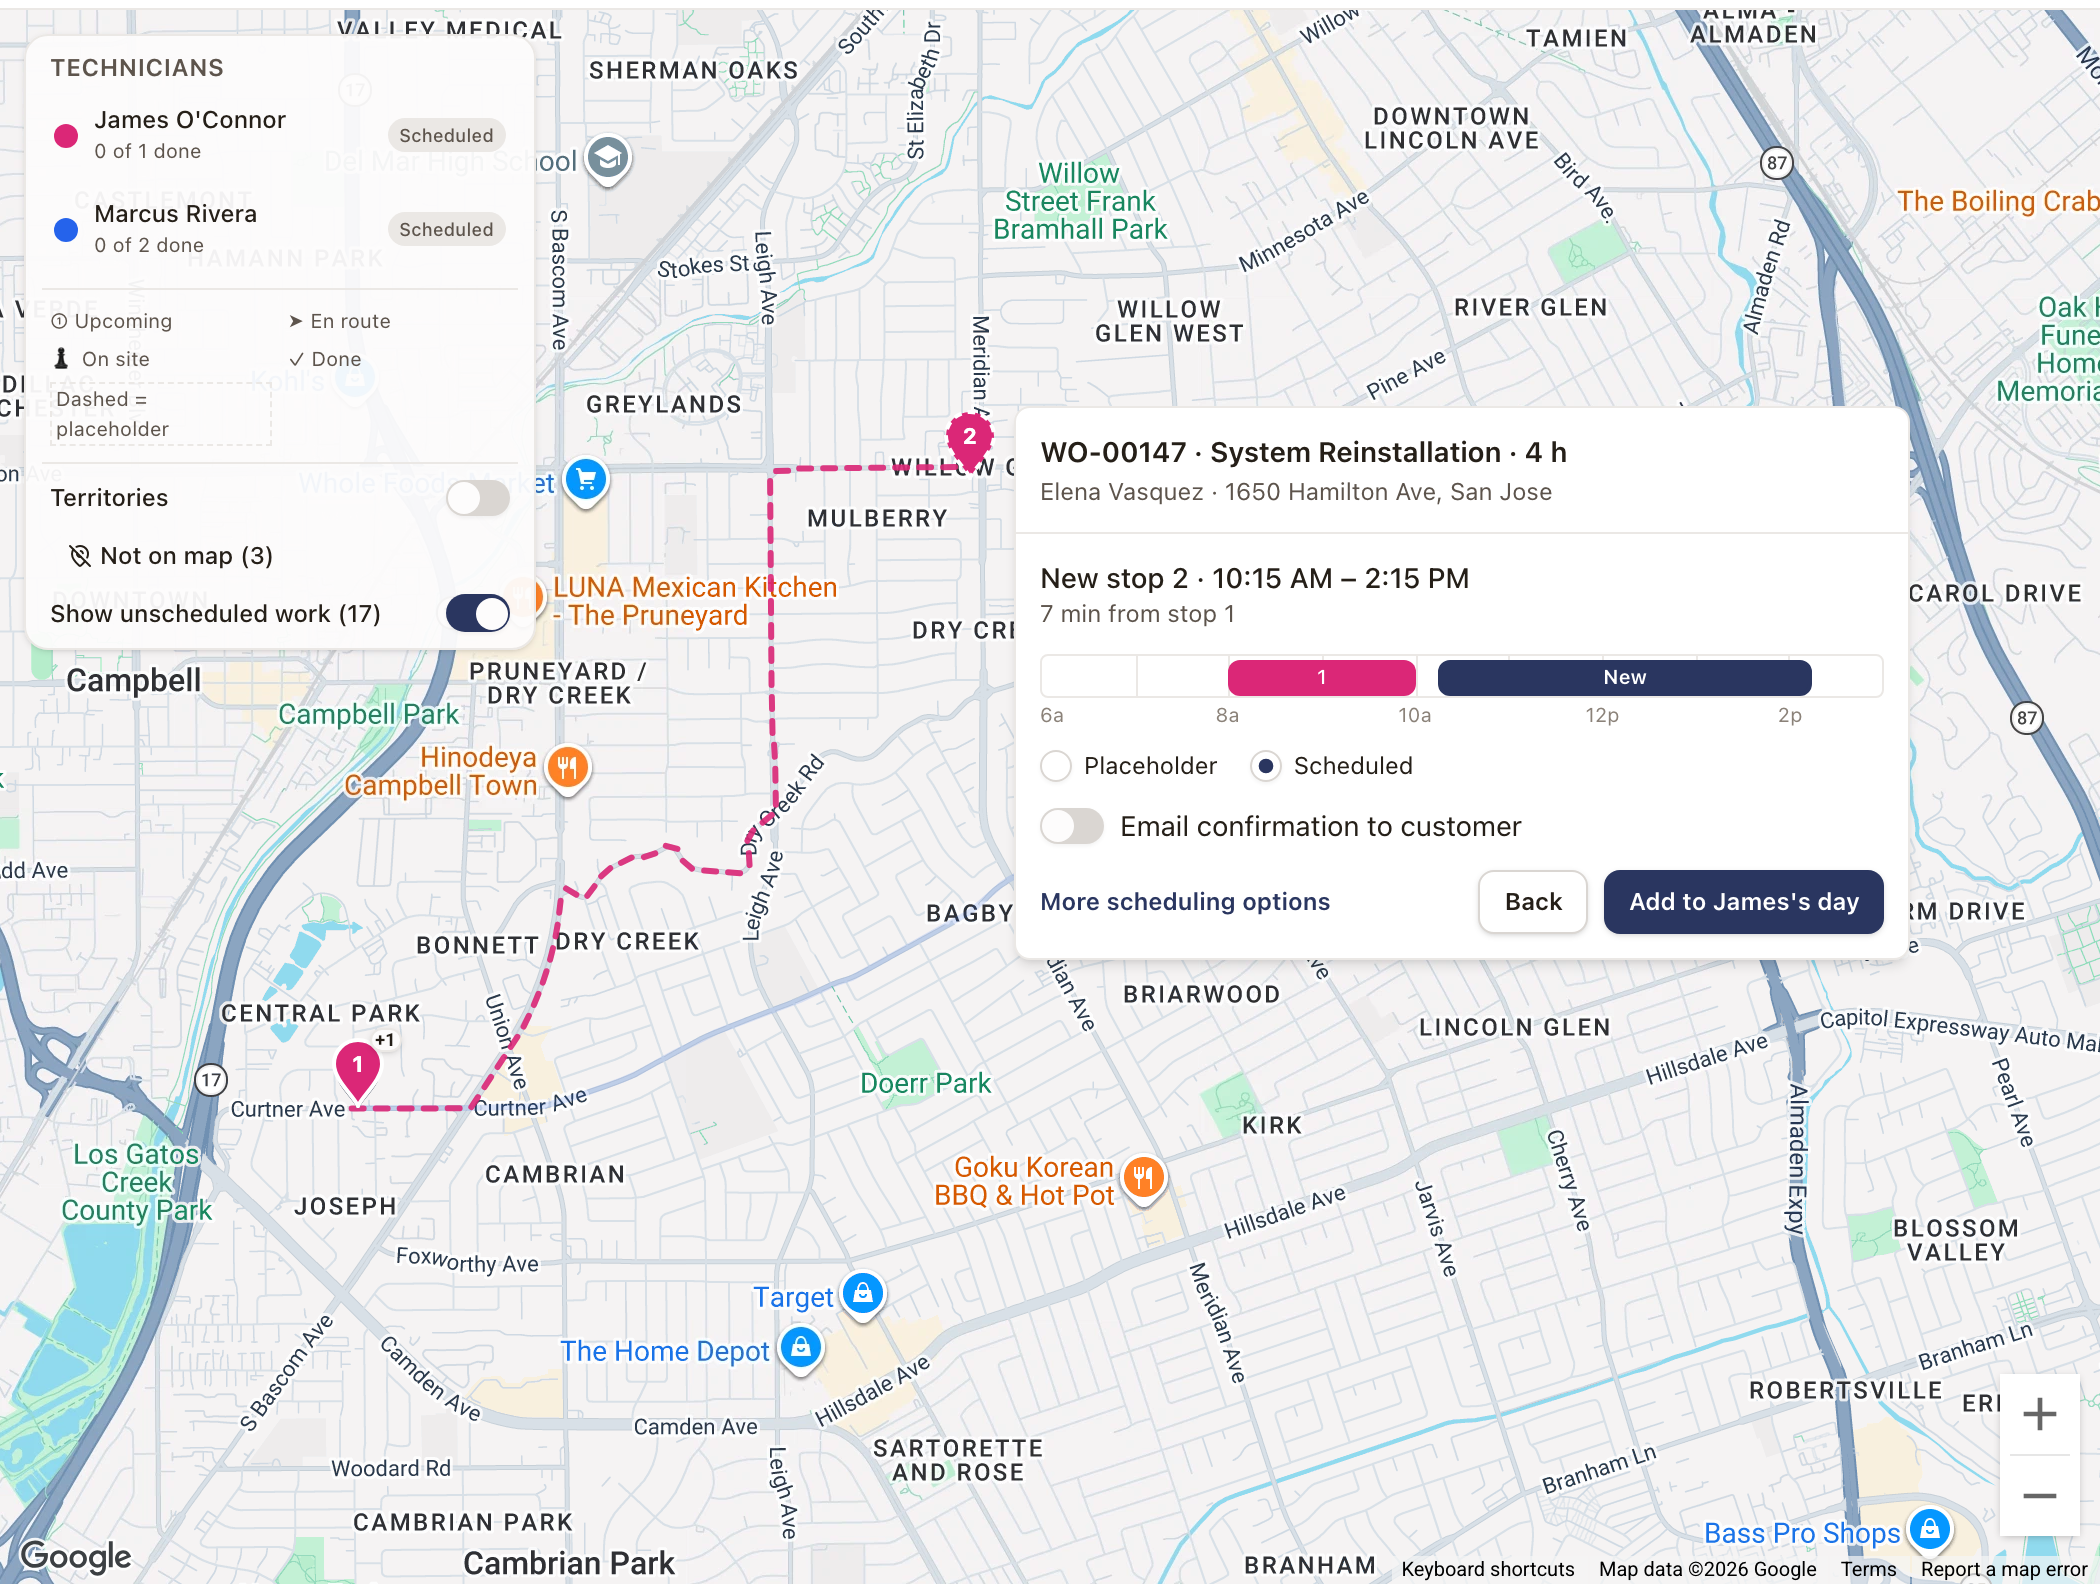
White pins appear for the ready work orders. Each technician's stops show as numbered pins in that technician's color, joined by their route. Hover a white pin to see the work order, customer, and address.
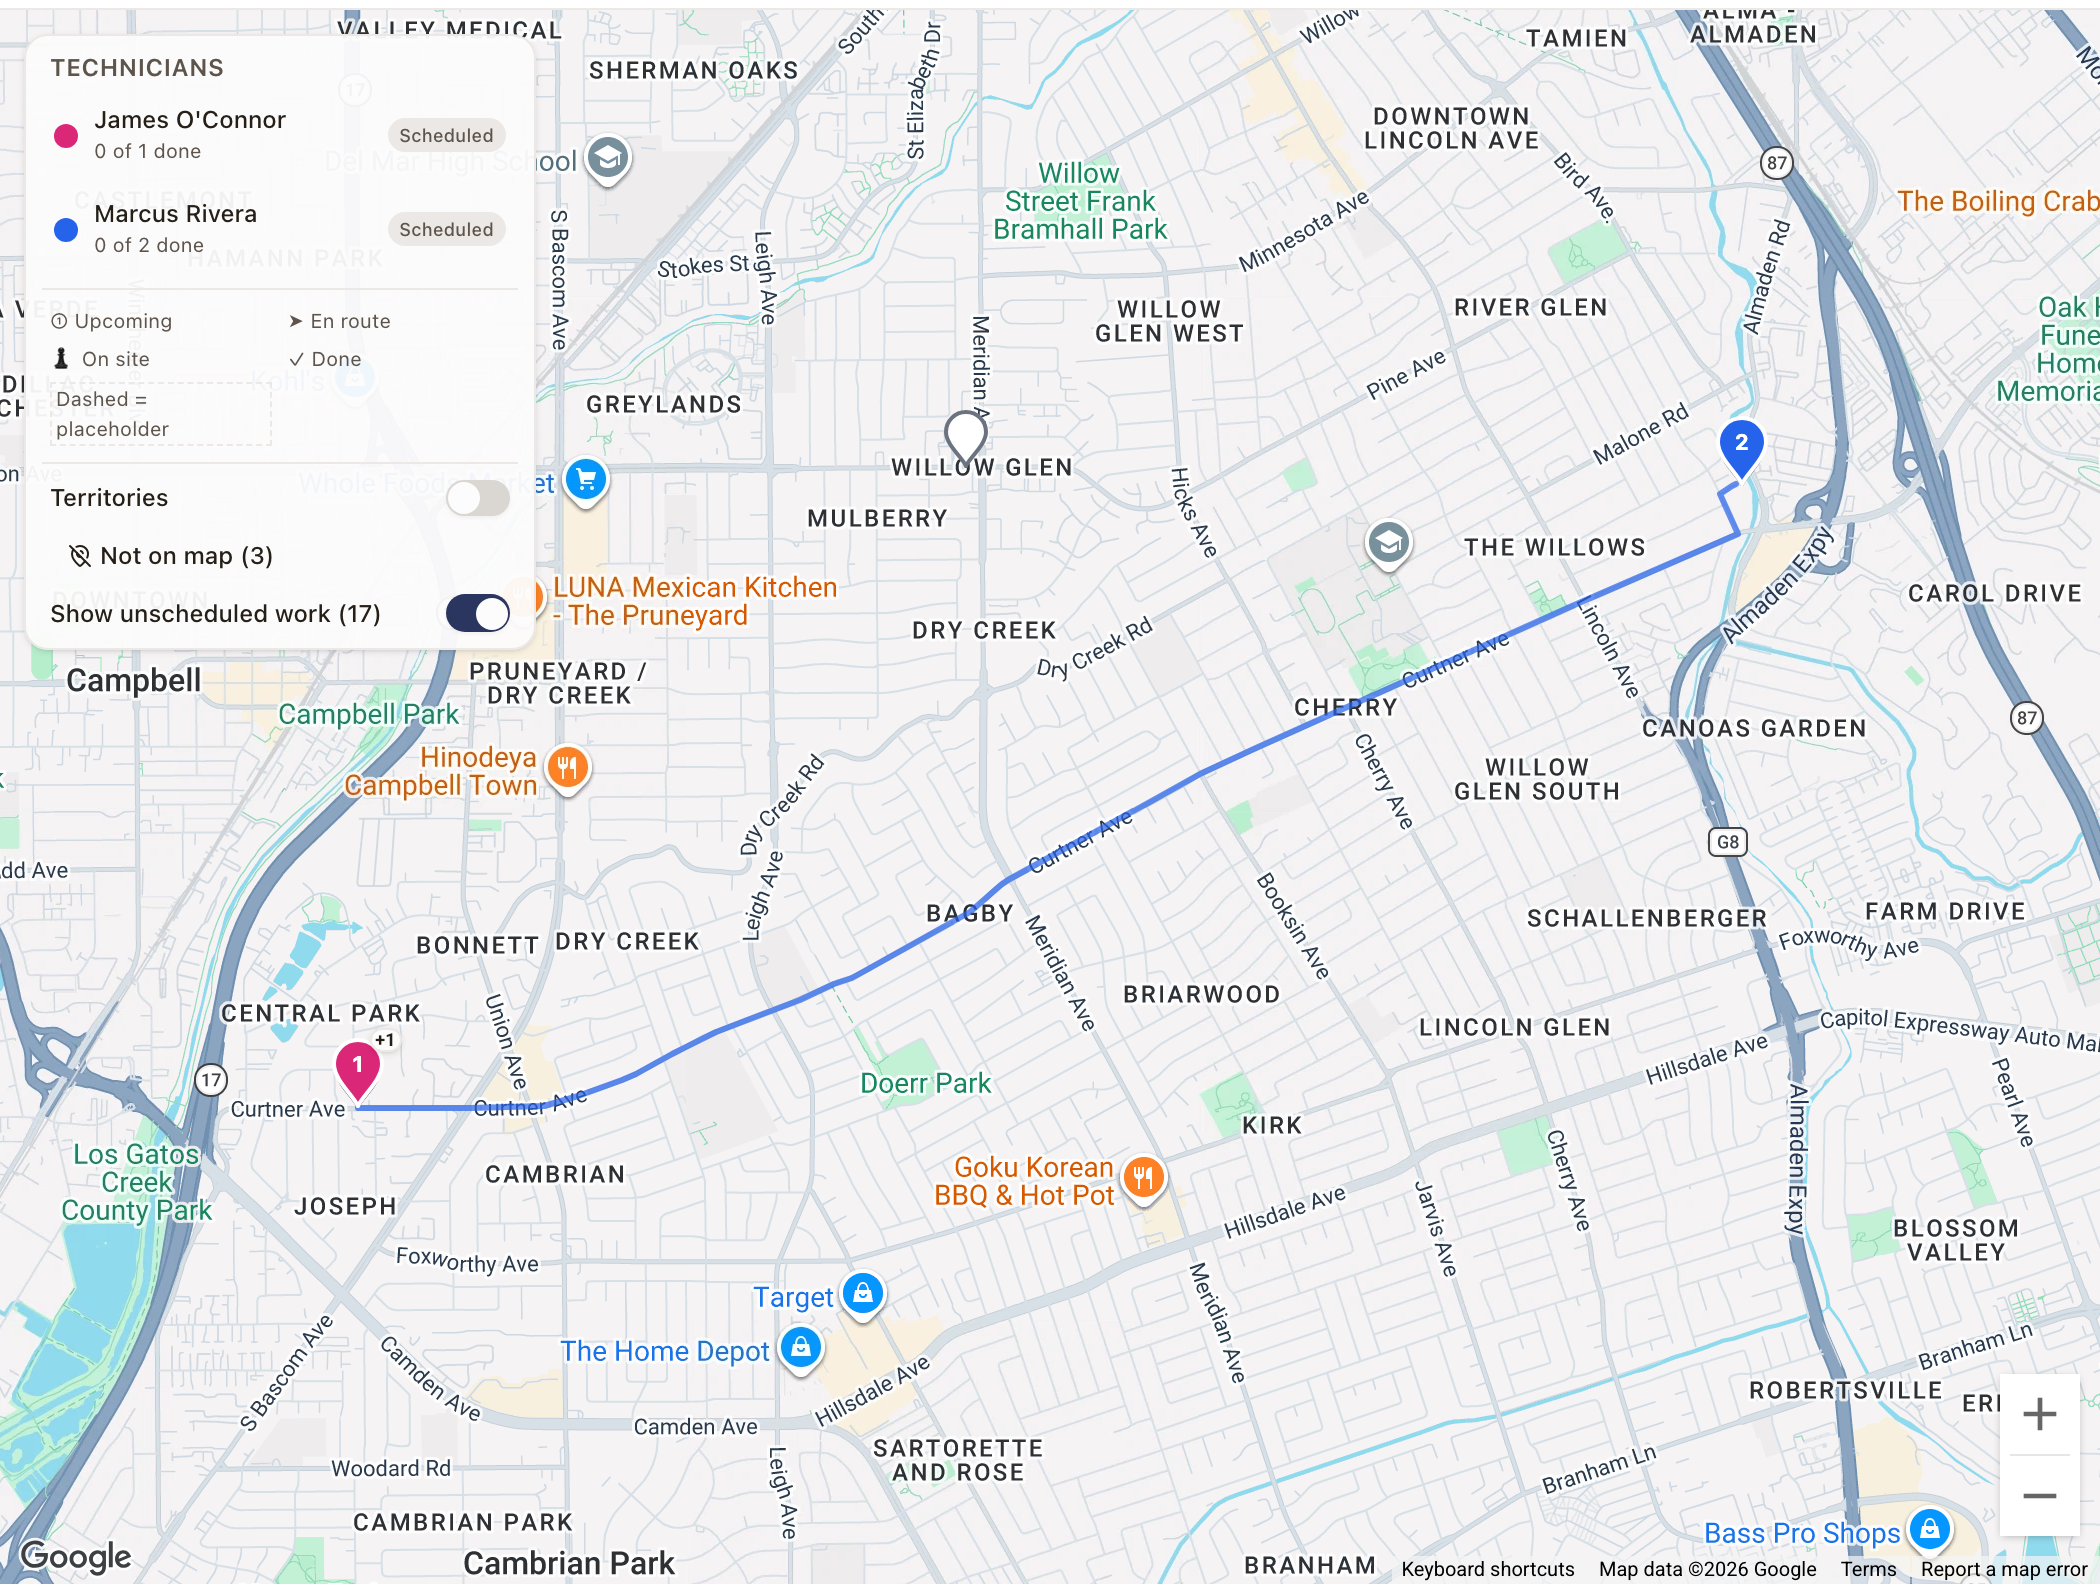
Work orders whose address can't be placed aren't pinned. They're listed under Not on map in the same panel. You can still schedule them from the sidebar.
Slot a job into a day
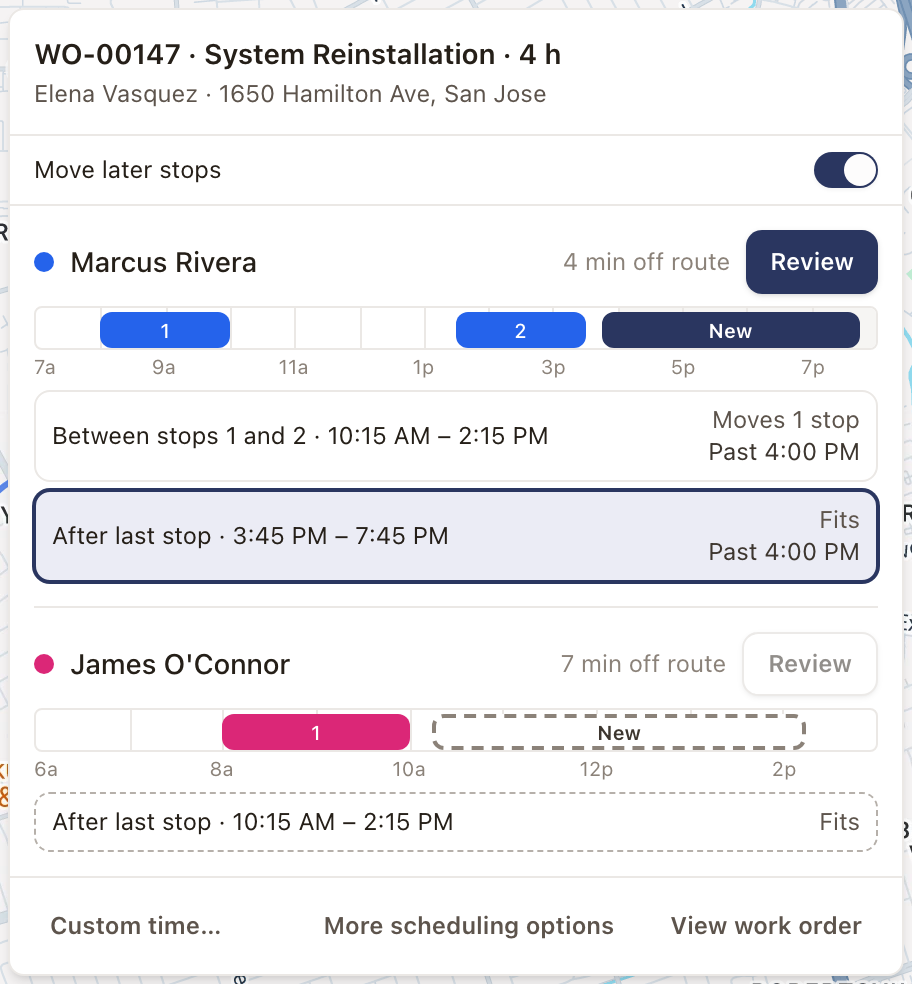
- Click a white pin. A card opens with the work order number, work type, how long the job takes, the customer, and the address.
- Under each technician you see a day lane: a strip of their day with their stops numbered 1, 2, and so on, and a dashed bar marked New where the job would go. Each technician also shows how many minutes the job takes them off their route.
- Below each lane are the spots that fit, such as Before stop 1, Between stops 1 and 2, or After last stop, with the time the job would run. The note on the right says what happens:
- Fits: nothing else changes.
- Moves 1 stop: a later stop would start later to make room.
- Overlaps stop 2: the job would run into another stop.
- Past 4:00 PM: the job would end after the technician's working hours.
- Click the spot you want, then click Review next to that technician. To choose your own time, click Custom time, pick the technician and a start time, then click Review.
Review and add it
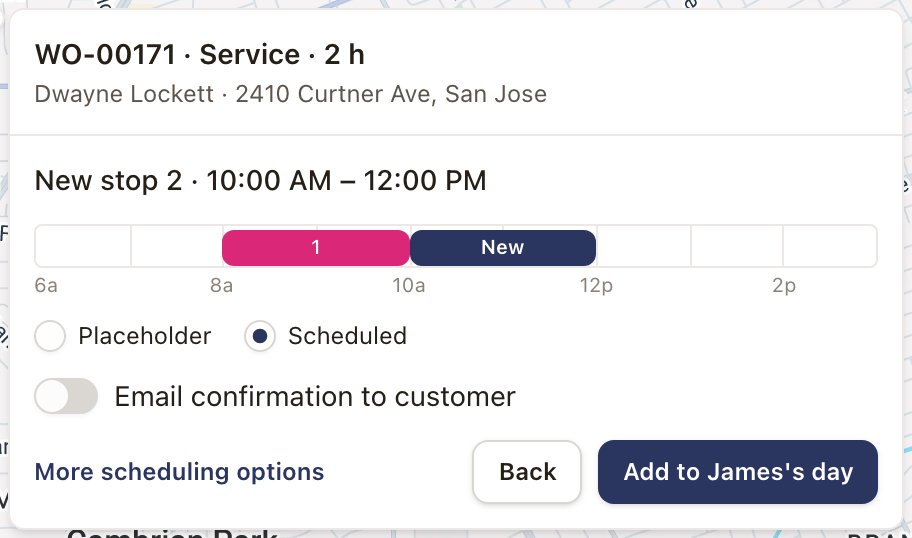
The review shows the new stop's number and time, the day lane with the new stop in place, and anything that needs your attention: a start before or an end after working hours, or a stop it overlaps.
If later stops move, they're listed with their old and new start times. A stop that was Confirmed with Client changes to Scheduled, and the customer is not emailed about the move.
- Choose Placeholder or Scheduled for the new stop. Scheduled is the default.
- Turn on Email confirmation to customer if you want the customer told about the new visit. It starts from your company setting. A placeholder never sends. Moved stops are not emailed.
- Click Add to the technician's name, for example Add to Sarah's day.
The map closes the card and shows a message such as "Added WO-00147 to Marcus Rivera's day", with "moved 1 stop" added when later stops slid.
Move later stops
The Move later stops switch at the top of the card is on by default, so later stops slide to make room for the new one. Turn it off to leave every other stop where it is. The job may then overlap a stop, and the card says which one.
Stops that have already started, and visits that come from an outside calendar, can't be moved. A spot that would need to move one of them is greyed out.
Open the full drawer instead
Click More scheduling options to open the Schedule Appointment drawer with the technician, day, and time filled in. Use it for multi-day work, or a technician who isn't on the map. See Schedule a service visit. Click View work order to open the work order instead.
Check it worked
- The white pin becomes a numbered pin in the technician's color.
- The work order moves from Ready to schedule to Scheduled in the sidebar.
- The visit shows on the technician's row in Day and Week view.
Common problems
- No white pins. Check that Show unscheduled work is on and that the day isn't in the past. A work order only gets a pin when it is ready to schedule and its address can be placed.
- A technician isn't suggested. The card says so when one of their stops isn't on the map. Use Custom time or More scheduling options for that technician.
- The card says "No technician has stops this day." Pick a day on which at least one technician already has a stop, or schedule from the sidebar.
Real drive timesBeta
Contact solarOS support to turn it on for your company.
With real drive times on, the minutes shown on the card, such as 12 min off route and 12 min from stop 1, come from actual driving routes. Each technician's route is drawn on the map between their stops, and while you review a spot, the new drives are drawn as dashed lines. Without it, those minutes are estimates and show a ~ in front of the number.
Hover a route line for its drive time and miles. The time doesn't count traffic. Click the line to open directions in Google Maps. Routes and pins dimmed because another technician is in focus ignore hovering and clicks.